Showing posts with label you-know-you're-taking-too-long. Show all posts

Saturday, December 4, 2021

Pocket Door Now Works!

One of the longest-running projects I've had in the JayBee is the pocket door and its wall leading into the bathroom. I built the door starting in 2012. I built the wall for it in 2015. I hung the door in 2016. I replaced the door stop for the wall with a removable one in 2020. (Hmm... This might be another entry in the "you know you're taking too long..." series.)

For years now, I've had the door tied to the door stop because the wall was not plumb so the door did not hang exactly in the middle and, because it hangs free from the top, it could easily swing from side to side and scrape the half-studs or even slam into them. Even when I warned visitors not to move the door, it was too tempting; everyone who sees it wants to operate it. So--I tied it down, to keep it from moving and getting damaged.


Most pocket doors are hung in a wall that is built with 2x6s. Every inch counts in a tiny house, so I purchased this kit that allowed me to install the door in a wall only 3.5" deep. It has half-studs reinforced with metal to accomplish this.


In the photo below, you can see that the door was hanging unevenly in the wall. This edge was too close to the righthand half-stud; the other edge was too close to the half-stud on the other side.


Now that the house is level, I could finally plumb up this wall. I removed the screws holding the base of the studs to the floor, moved the studs until they were plumb, and reattached them to the floor.

Then, I decided to make use of these occasional holes in the metal reinforcing on the sides of the studs.


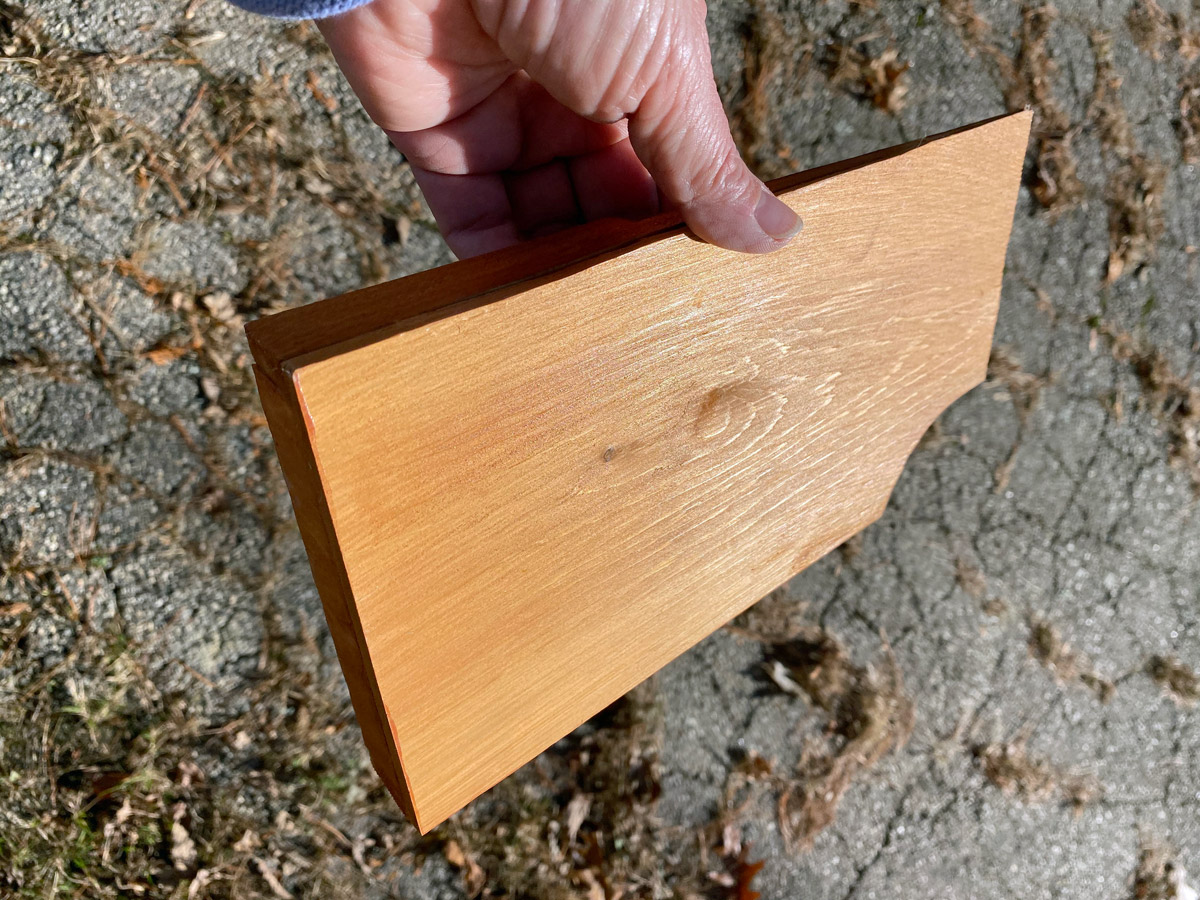
I cut boards to length and put pocket-screw holes in the ends of them.


I used the boards to span between the two half-studs on each side of the wall.


Now the door slides back and forth in the wall without scraping and crashing.


For a little extra insurance, I wrapped each of the new boards with leftover strips of sill insulation.


Voilá! A functioning pocket door. Now the door can be moved in whatever direction makes it easiest for the plumber to do his work.

That's the great news! The plumber is back in touch, and he will be doing the rest of the plumbing work in about a week.


Also see:

Pocket Door 1
Pocket Door 2
Pocket Door 3
Pocket Door 4
Pocket Door 5
Pocket Door 6
Wall for Pocket Door
Pocket Door Wall Done!
Dubbing Around the Edges (includes new door stop for pocket door)


Saturday, April 18, 2020

You Know You're Taking Too Long (to build your house)...

...when it's been ages since anyone has seen any progress on your build but you're posting about anything but building progress.

Since my body is doing better (including having had shoulder surgery just before this pandemic took hold, thankfully) and I'm stuck at home (as is everyone else), I'm starting to get myself organized to make progress on the JayBee.

Here is something I accomplished last fall before the snow flew. I permanently installed nest arrestors on the back side of the house to prevent nest building on the house this spring. I removed the nest from above the bathroom fan...


...and built a nest arrestor out of shingles.


Once I finished that, it dawned on me that I could make a bigger version to sit on top of the air exchanger.


I haven't come up with an idea for something that I would like to permanently install over the lights on the front side of the JayBee to prevent nest building there--so I'm continuing to use these cardboard nest arrestors during the non-winter seasons.


Saturday, March 30, 2019

Changin' My Mind (another in the "You Know You're Taking Too Long" series)

You know you're taking too long to build your house... when the multiple years slipping by give you endless opportunities to re-think and alter plans.

Thankfully, even all these years later, I am still very happy with the floor plan I designed for the JayBee. When I designed the house, there were very few tiny-house designs to find. Now... just about every design possible has been done. I think my design holds up. It still feels like the most functional design for me. (Wouldn't it be horrible if I was trying to finish a house I now thought was fatally flawed?!)

This winter, though, I surprised myself by doing a complete about face with my energy plan for the JayBee. Many years ago, I wrote this post about my plan to use propane appliances for cooking, heat, and hot water--primarily because those things would still function just fine when the electric power went out, which it does with some regularity where I live. Last summer, I decided I needed to let go of my plan to bring my beloved range/heater into the JayBee. At 40,000 BTUs, it would have heat-blasted me right out of the house. (The skepticism of several propane installers sunk in at last, I guess.) I still was thinking, though, that I would use a propane range (just smaller) and a propane water heater. I planned to add a propane wall heater with a nice little fireplace-like window.

A few weekends ago, I changed my mind. After years of staying on the same steady track, everything just shifted. I decided I will not use any propane appliances in the JayBee. These things all finally coalesced in my mind:

  • I didn't want propane appliances that use electronic ignition since that would render most of them useless when the power went out. But why would I want open pilot lights in my tiny house compromising the air quality?
  • Every winter, getting routine propane deliveries is a challenge. While I generally don't have a problem getting my car up and down my icy driveway, the propane delivery trucks have a huge problem with all that ice. Did I really want to spend my future winters worrying about the timing of propane deliveries?
  • Even though I have pre-purchased all kinds of fixtures and appliances for the JayBee and have been building with them in mind, I have not been able to commit to any of the propane appliances I have researched endlessly. Hmm... maybe there are good reasons for all that hesitance?
  • The only propane wall heater I like is one that does not have a thermostat so really shouldn't be left running if I'm not home. Not reliable heat for the winter.
  • The one system I have never started in the JayBee is the propane system. No pipes yet installed. No holes drilled. Why not simplify and save all those additional punctures to the building's envelope?
  • The salesperson for the electric-radiant heat system I'm planning for under the floors of the JayBee pointed out that their system uses so little energy, it works well with solar panels.
  • I had always planned to add solar panels at a future date. Maybe the future is here?
New plan: Everything in the JayBee that requires energy will be electric. Electric-radiant heat under the floors, supplemented with one or two electric wall heaters. Electric induction cooktop (cooks faster than anything else, and won't add heat to the space). Electric convection oven. Electric on-demand water heater. Simple. No fossil fuels. No open pilot lights.

I don't know that I can afford the solar panels this year, but the plan is to install ground-mounted panels on the south-facing hillside behind the JayBee. When I was at the Maine Flower Show a few days ago, I talked with a solar installer who told me that their grid-connected systems are usually installed with a battery backup system that automatically kicks on when the grid-supplied electric power goes out. Perfect.


Monday, July 9, 2018

Ode to Imperfection (Interior Walls 11)

This phrase has been repeating in my brain for about ten days now. "Ode to Imperfection" ... as in ...
JayBee: Ode to Imperfection

This project has brought me to a place of feeling okay about imperfection. (Okay, okay, calm down, those who know me and know what a perfectionist I can be.) I swear it's true. This project is full of things that have ended up just a little bit off. Working with wood is like that anyway. Wood moves. It can bend, twist, shrink, and expand. When framing would end up a little uneven, I'd tell myself I could adjust for it with the finish materials. This project is now at the point when not much more can be covered over. The finish materials show. I am happy with how things are turning out but, along with that, I have reached the point of just smiling when there's a little wonky bit here or a slightly-off bit there. Most of it no one else will ever notice, but I know it's there.

Here's a small example: Up to this point, I hadn't had to install two boards with their butt ends together. I had installed all boards that were long enough to run corner to corner. Knowing I would have to join two boards end to end at some point, I used some scraps to work up this prototype. First try, and I liked it. Rather than join the butt ends of the boards together, which would never stay tight enough to look good, I decided to do a series of angle cuts. The left board has a continuous 45-degree angle cut that slides under the right board. The right board has an angle cut that matches the left board. Then, the right board has an additional angle cut on the top edge of the board that goes in the opposite direction--which results in this. If the boards shrink or swell a bit, this joint will continue to look good.


Great prototype--but, then, I failed to implement the plan correctly. On my first real use of this join, I made the last cut go halfway down through the top board, instead of only a third of the way through. (Learned my lesson for future cuts!) I could have set this board aside and cut a new one, but I installed it anyway (see below), with the resulting small gap at the bottom of the join, because I think this joint will be covered with the window trim. Others may never see this error, but I will know it's there.


My July 4th week was not as productive as I had thought it would be. For one, it was deadly hot and humid! Once the weather gets that oppressive, my energy just plummets. Next, I had a terrible outbreak of caterpillar rash. Instead of individual rashy bits breaking out a few at a time, as had been the case up until last Monday, all of this (below) broke out at once. My neck and chest were on fire! Ended up seeing a doctor and filling a few prescriptions. Best source of relief: running ice cubes continuously back and forth across my neck.


When the rash calmed down a bit, I resumed work on the JayBee. The heat was still oppressive, so I worked on picky little bits--like custom-cutting pieces to fill in the gaps in the open spaces around some of the ceiling joists. Fussy work.


I also finally moved the steps in front of the JayBee. I had been using the small stepladder to get in and out of the house but, once I started moving that ladder inside to work up high on the walls, it got too frustrating. When we finally had a cool day, I moved the steps.


One more row done high up on the north and east walls.


Two more rows of boards installed in the bathroom.


Here's one for the annals of "You Know You're Taking Too Long..."
You know you're taking too long to build your house when someone who started building her tiny house when I started mine has not only lived in her tiny house for five plus years, but has now moved on to an entirely different living situation--(not because her tiny failed her, but because her life changed). <sigh> And I'm not even done building mine yet. See Ella's story.

Also see:
Interior Walls 1
Interior Walls 2
Interior Walls 3
Interior Walls 4
Interior Walls 5
Interior Walls 6
Interior Walls 7
Interior Walls 8
Interior Walls 9
Interior Walls 10
Interior Walls 12
Interior Walls 13
Interior Walls 14
Interior Walls 15


My son trying out his paddle board on the Kennebec River...

Yup, he's way out there, to the left of the red buoy, paddling back from the far side.


Friday, February 23, 2018

Yes, I'm Alive. The JayBee project is still alive, too. (another in the You Know You're Taking Too Long series)

Yes, it has been a LONG time since I posted a blog update. I guess I have crossed some tipping point, though, by letting it go this long; I have heard from a number of people in the last week who are tired of waiting. So, in an effort to regain some momentum--both with the JayBee project, and with the blog posting--here is a mish-mash post of random things from last fall.

Before the snow flew, I finally removed the nest from the top of the light outside the JayBee's front door. I was surprised by the amount of clay/mud included in its construction...


...and by how clean it was. Two birds were fully raised in this thing!


I also removed the nest from the top of the air exchanger on the north side of the house. Finally, once again, the JayBee was nest free!


Here is George happily curled up in a box. If you look really closely, you might see one of his eyes wide open (on the far left).


George looking skinny skinny. Thankfully, around Thanksgiving time, he finally put on some winter weight, so he looks better these days. I'll try to get an updated shot of him soon.


Here's a strange thing I just have to share: In a neighboring town, there is a house that always has a sign posted in its yard--with one word on the sign. Every few weeks, the sign is changed to have a new word. For example...


I go by this house on my way back and forth to my chiropractor, and I have gotten in the habit of making sure I look to see what the latest "word" is. Imagine my surprise when I drove by one day last fall and this enormous cat was in the yard along with the sign! After a few weeks, the cat disappeared. The sign is still there.


Here is a bald eagle circling overhead last fall. Bald eagles in the trees outside my bedroom window woke me up recently. My neighbors tell me it's now their mating season, which apparently explains why they are so active and loud these days.


Tomorrow I will post an update on JayBee progress and plans.

Thursday, September 21, 2017

You Know You're Taking Too Long to Build Your House When...

...the posts your house has been sitting on are disappearing down into the ground. The big round cinder blocks I put at the base of each post stand 8 inches high, yet, in some cases, only a few inches are still above ground.


This is a problem now because I need to level up the house before I install the horizontal wall and ceiling boards on the interior. This is made all the more challenging because the northwest corner of the JayBee's trailer, the corner that has always been closest to the ground due to the slope of the hill, is currently sitting on the ground--making it difficult to fit a jack underneath it.

You Know You're Taking Too Long to Build Your House When...

...your building permits expire. I mentioned in a prior post that I was going to have to pay for new building permits because I am taking so long to build the JayBee that my permits had expired. That is what I was told by the Code Enforcement Office in mid July.

Good news! When I went to City Hall this morning to get the inevitable over with, I learned that I will not have to pay for new building permits. Since I have been having regular inspections (including one that occurred in late July), the Code Enforcement Officer told me today that she considers my building permit to be still "active," even though my project has taken years. Apparently, as long as I keep working steadily and get regular inspections, I should be all set. Thank goodness!

Friday, July 21, 2017

Time to Catch Up

I have been lagging in my posts! To catch you up...

I have finally finished installing insulation in the JayBee. It took me way longer than I'd anticipated because...well, everything takes me longer than I anticipate. Plus, I was working around some birds. Yup, birds.

This was the first sign that the birds were taking over. If you look closely, you will see a bird's nest sitting on top of the air exchanger that's above the north side window.


Then, I noticed mud splatters around the front door of the JayBee. And, a partial nest fell to the doorstep.


Not to be deterred, birds quickly finished this nest on top of one of the lights outside the front door.


Every time I went in and out of the JayBee, I had to contend with anxious, dive-bombing parent birds. I worried every time I turned on the compressor that I was traumatizing them. I didn't dare leave the front door open for air flow because I thought it would lead to a crazed bird flying around in the rafters. I couldn't hang the awning on the front of the house to cool it in the summer sun because it would block the parent birds from getting to the nest.

After way more weeks than I thought it was possible for birds to sit on a nest, there were finally two big fat babies.


As of the end of last week, it appears that all birds have left the nest. (No feathers in the driveway either, so the cats didn't snag any of them.) I've been warned that sometimes birds re-use a nest for a second hatching, so I better get busy with taking it down and crafting some kind of nest blocker.

In the meantime, I did finish insulating...


As I worked on the insulation, I kept finding places in the framing that needed nailers to catch the ends of boards when I install them on the ceiling and walls. To save time later, I installed those nailers as I went.


The city Code Enforcement Officer signed off on the insulation today, so that's good.

I took delivery of a lot of pine boards (for the ceiling and walls) and some fir boards (for the bathroom). 


As the load was tipped off the back of the delivery truck, the bottom boards stuck to the flat bed and pulled themselves far out from the rest of the load. In order not to snap those boards off when the load crashed to the ground, the delivery guy propped the load in a bizarre (but effective!) fashion.


I spent the rest of that hot, humid day carefully stacking every one of those boards. There were a few moments when I thought, "Wow, these stacks are getting pretty tall; maybe I should use stickers." Note to self: When you have a nagging thought, PAY ATTENTION!


The next day, when I heard a thunderous crash, I knew just what it was. (I worried that the avalanche of boards had killed George, since one of his favorite hangout spots is in here, but he was elsewhere and just fine.)


It took me another entire hot, humid day to pull the boards out of the garage and re-stack them--with stickers.


As I work on installing plastic as a vapor barrier on the interior walls, and installing the radiant barrier (which will also serve as a vapor barrier) on the ceiling, I am beginning to stain some pine boards so I will have some ready to install on the ceiling.


I had explored the possibility of using beetle kill pine on the living-room walls. It turns out it is outrageously expensive to purchase here in Maine, since it all comes from Colorado and Wyoming, so I nixed the idea and purchased regular pine. I couldn't get the idea out of my mind, though; I think it's that pretty! (Have you seen it? Check out these images.) So, I have been experimenting with creating my own faux beetle kill pine effect with a custom blue-gray stain, and white milk paint used as a whitewash or pickling on top. Something like this maybe?


For those more interested in news of the river...

It's still here!


The sturgeon are jumping. I hear their loud belly-flop smacks up at the house all the time, and I occasionally see one poised high in the air over the water.

I hear eagles every day, and see them often. There are at least a few of them living right around my house this summer.


We had some extreme rainstorms this spring. In all 26 of the years I have lived here, I have never before seen this kind of erosion occur as a result of one rainstorm. Bizarre, dramatic, dangerous.


For those of you more interested in the cats...

Cat (Bear) sleeping in the woods on a hot day.


At first glance, this next shot looks like George sleeping in the driveway.


It's really a dead-to-the-world George in the foreground...


...and interloper tuxedo cat hanging out with Bear up on the drain field.


I will finish with a small gallery of George--who turns 18 this summer. He appears to be quite deaf at this point, which puts him at a distinct disadvantage because things can creep up on him. In fact, he was attacked by a fox (yes, a fox!) as he lounged on our deck. I was home at the time, heard the commotion and ran to the door, just in time to scare off a fox. George did not appear to be injured, and he still wants to spend all his time outside, so I just hope he keeps his wits and sharp claws ready. He still is able to channel his former alpha self when it's needed, thank goodness. And he still likes to go on walks with me.

[Side note: I felt like wildlife was invading my life this spring. Bird nests everywhere. Fox attack. Eagles screeching every day. Startled a porcupine sleeping in the garage one day when I went to take out the mower. Three strange cats (tuxedo cat, marmalade cat, and tiger cat) spend a lot of time in the yard--sometimes "hanging" with my cats, other times fighting with my cats. Startled a skunk on my deck one night--yes, who sprayed, thank you very much. When taking compost out to the compost bin, I regularly startle deer who are grazing on top of the drain field--and they startle me back. I spent eight weeks covered in a rash caused by caterpillar hairs that had me digging my skin raw. Thankfully, things seem to have calmed down a little these last few weeks. It was just exhausting!]


When I heard George make a cat-fighting sound one morning a few weeks ago, I immediately went running. I thought maybe a fox was after him again. Instead, this is what I saw. Now, keep in mind that George hasn't caught a creature in forever. I never see him stalking or catching anything any more. Back when he did hunt, he did it silently. So, for him to make a fighting sound means that either something attacked him or startled him. I think this stupid squirrel touched a soundly-sleeping George, and this is what he got for his trouble.


The squirrel ordeal wore George out so completely, he didn't leave this spot on the deck for the entire next day!