Showing posts with label subflooring. Show all posts

Saturday, July 4, 2015

Subflooring 3

It's about time I finished the floor!

Before my consultation with a plumber on Friday, I was catching up on all kinds of odd jobs. Staining more shingles; no pictures, just take my word for it. Bending thousands of staples over on the inside of the JayBee walls.


Cleaning out the JayBee.


All necessary but boring/thankless tasks.

After the plumber told me that the holes for the drain lines are more easily drilled through the completed subfloor, I jumped to get the floor done.

This end, the bathroom end of the JayBee, has looked like this for years.


I used clamps to hold the bottom on the bumpout until I could get it screwed in place.


After that was done...


...I started adding insulation to the bays. When the insulation batts are the exact size of the bays, this moves along quickly.


And Roxul is so easy to cut, even custom-cutting batts goes quickly.


After the insulation was installed, I added the radiant barrier.


Dale was kind enough to help get this plywood installed. I had the piece cut and in place, but I just could not get the groove engaged with the tongue on the adjoining sheet. With Dale's help, we got it done!


I'm particularly pleased with the end piece of subfloor. I cut a groove in the side of the piece--that fit perfectly over the tongue on the adjoining piece.


Subfloor is done!

Also see:
Subflooring 1
Subflooring 2

Saturday, July 16, 2011

Subflooring 2

I began the day knowing that I needed to install the pressure-treated boards in the entryway and install a bottom on the bedroom bumpout before Dale and Arlen arrived to help with installing more subflooring. So, the entryway looked like this before I glued and screwed the boards in it.


I forgot to take an "after" photo of the entry (but you'll see it later in a photo that shows some insulation installation) because I quickly moved on to cutting a board for the bottom of the bedroom bumpout.


There are times that I think I am the queen of workarounds. How is a person supposed to hold a board up against the underside of something and put screws into it at the same time? I used clamps to hold the board in place. Then I laid on my back on the ground to put in the screws.


After the board was glued and screwed, I added some spray insulation along the cracks/intersections for good measure.


Next, I moved on to installing more insulation in the floor bays. Notice the completed entryway in this shot as well.


Dale and Arlen arrived and started working on subflooring. We absolutely cooked out there! The sun was beating down from above and reflecting off of the radiant barrier at the same time.


I finished installing batts of insulation...


while Dale and Arlen continued cutting and installing plywood.


Even though it looks like Arlen is standing on the radiant barrier and insulation in this next shot, he actually has his feet positioned over some joists.


Before I could screw down all of the plywood sheets, Bear just had to check things out.


After I screwed down all the plywood, things looked pretty good!


Phew! I'm ready for bed...and the sun has not begun to set yet.


Also see:
Subflooring 1

Thursday, July 14, 2011

Subflooring 1

Dale and Arlen came over tonight to help me with installing subflooring. What a huge help! For me to wrestle around pieces of 3/4" plywood by myself would have taken forever.

First, we installed 5.5" batts of Roxul insulation in the bays between the floor joists. (Roxul is a stone and wool mixture that is flame retardant and will not absorb moisture. It also has borax in it so insects are not attracted to it.) This stuff is fun to work with! It is easy to cut with a serrated knife and it firmly holds itself in place against the joists. Easy! (I'm now thinking I might want to use this in the walls and ceiling as well...)


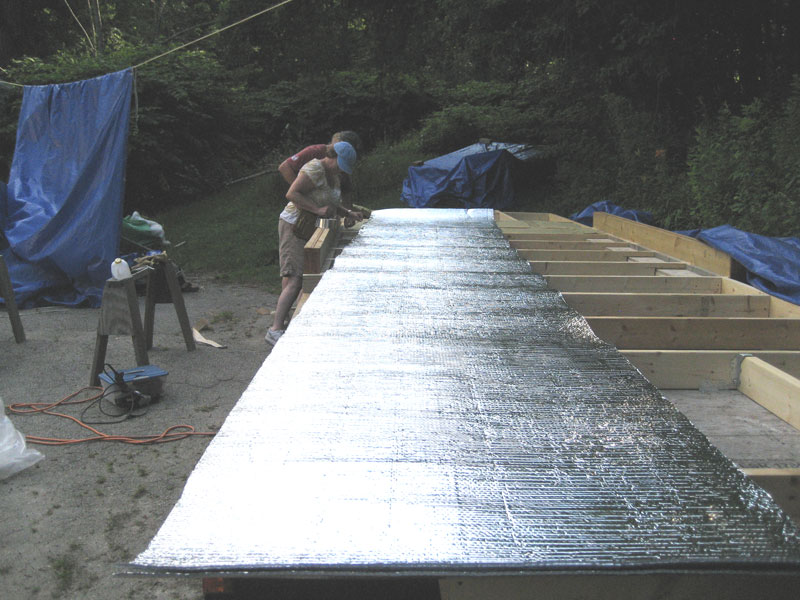
Then we worked on installing the radiant barrier. This type has a double-thick layer of air bubbles between two foil layers. It will serve as both a radiant barrier and a vapor barrier. It is supposed to add R14 to the surface on which it's installed. (See my previous post about radiant barriers.) We started by cutting two long pieces, laying them on top of one another...


and then taping the long edges together on one side with special foil tape.


Then, we opened it up and laid it in place as one huge sheet.


We did not staple it down or anything because the plywood held it in place just fine for us to attach the plywood to the joists with screws. That first piece of plywood installed so smoothly, we decided to install two more. First, we filled four more bays with insulation.


We tried a couple of methods of holding the edges of the radiant barrier in place so we could set the pieces of plywood down and still have the edges of the radiant barrier stick up beyond the edges of the plywood.


It took a couple of tries. The method that worked was to tape the outside edges of the radiant barrier with duct tape. Of course! Is there anything duct tape can't fix?


The plywood had to be cut before putting it in place, because it had to fit between the headers over the wheel wells.


We set the pieces of plywood in place, fitting together the tongue and groove edges, and screwed them down to the floor joists. Three pieces done! (This represents the floor of the kitchen, the laundry area, and half the living room. :-)


The subflooring for the rest of the living room and the bedroom will be installed this weekend. I will get the insulation all installed, and then Dale and Arlen will come over and help with the plywood. The bathroom end will wait until a plumber takes a look and has a clear idea about the location of wastewater lines. (Speaking of which, why is it that I cannot get a plumber to call me back?! I had thought this would be a good time to get this kind of help because tradespeople would be eager for the work. Apparently I was mistaken.)


Also see:
Subflooring 2