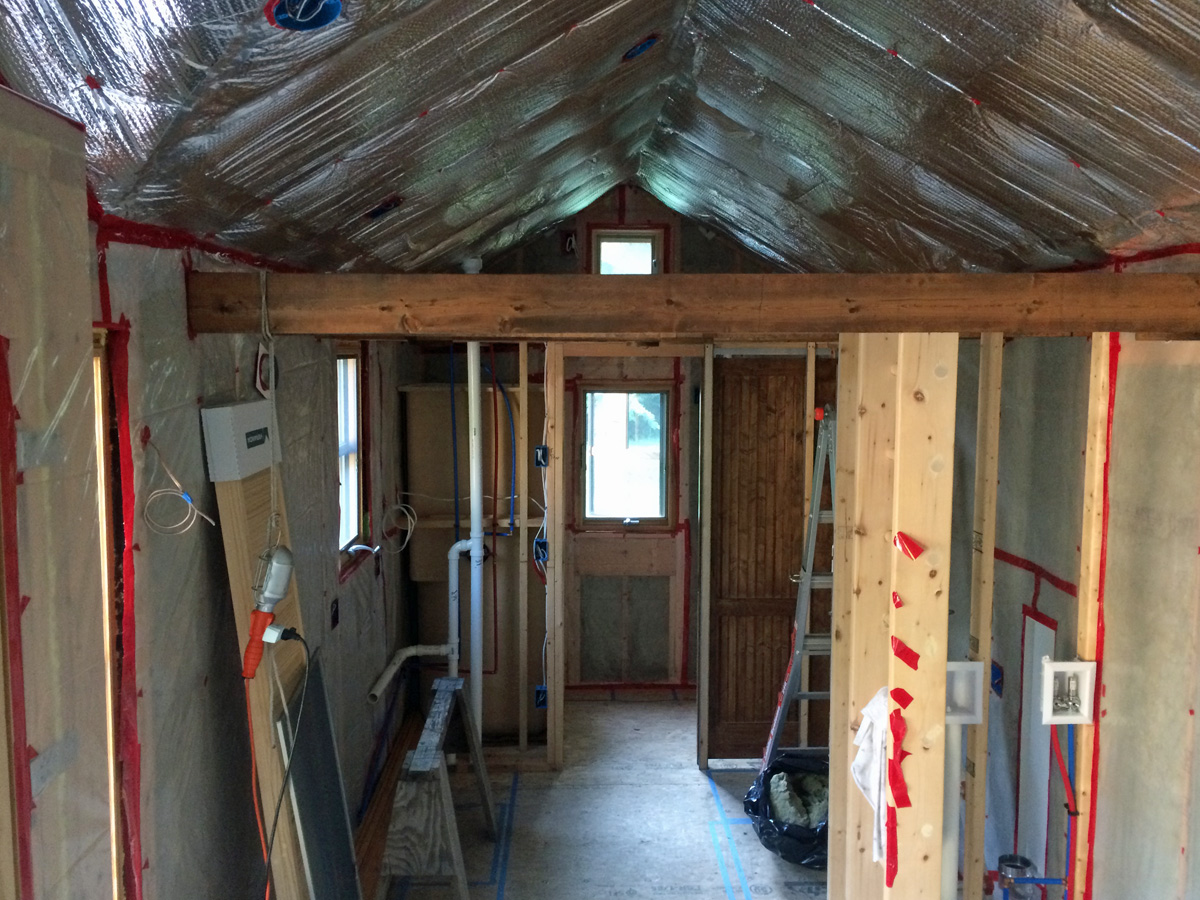
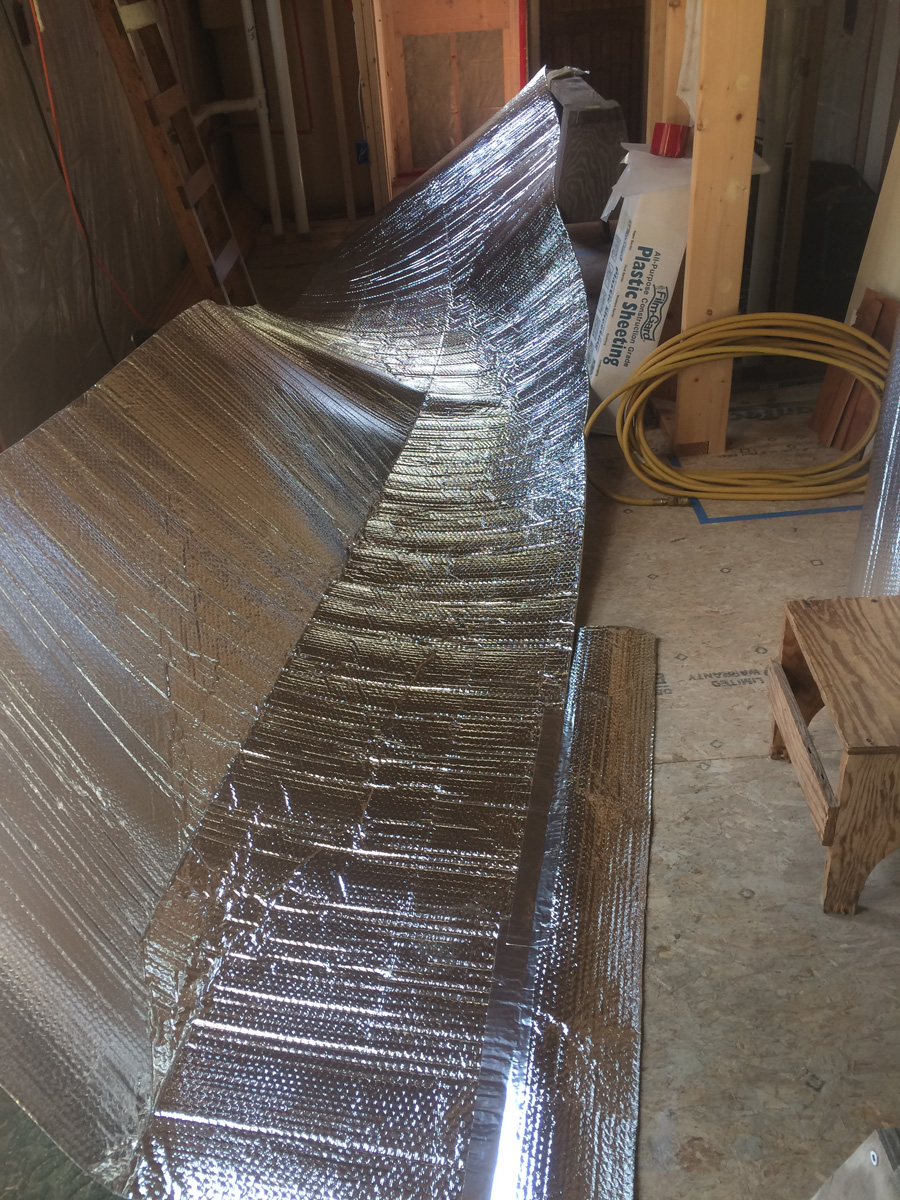
All of the vapor barrier and radiant barrier is completely done! Every joint/break/seam is taped.
I miscalculated how much radiant barrier I needed for this project--by a lot. I never even opened this last roll.
I continued to install boards in the corner of the closet...
...until I was done.
The view from the inside of the closet...
This next shot is looking straight down the outside wall of the closet. I placed a board on the outside there to show that there is a purposeful gap between the lower edge of each of those boards and the kitchen wall on the outside of the closet. The gaps should keep these boards from trapping a bunch of dirt at their bottom edges. Because...
...all of these boards are shelves for shoes!
After finishing the shoe shelves, I cleaned out the JayBee and vacuumed. From the bed alcove, looking toward the bathroom/west end...
From the bathroom looking toward the bed/east end...
The JayBee is now ready for ceiling and wall boards.
Showing posts with label radiant barrier. Show all posts
Monday, September 11, 2017
Monday, September 4, 2017
Radiant Barrier (Almost) Done
After installing long strips of radiant barrier on the rest of the JayBee's ceiling,
I should be declaring that the entire radiant/vapor barrier is done. Unfortunately, I ran out of the tape I use to seal the joints and breaks, and the resupply I have ordered has not yet arrived. So, that means it is close to done, but not quite.
In the meantime, here is a puzzle. I have begun to install these boards in the closet wall. This is the view from the kitchen side.
This is the view from inside the closet.
Maybe you can guess what the boards are for? When I'm done installing them, I'll let you know their purpose.
I should be declaring that the entire radiant/vapor barrier is done. Unfortunately, I ran out of the tape I use to seal the joints and breaks, and the resupply I have ordered has not yet arrived. So, that means it is close to done, but not quite.
In the meantime, here is a puzzle. I have begun to install these boards in the closet wall. This is the view from the kitchen side.
This is the view from inside the closet.
Maybe you can guess what the boards are for? When I'm done installing them, I'll let you know their purpose.
Categories:
cabinets,
closets,
radiant barrier,
tiny house
Monday, August 28, 2017
More Radiant Barrier
Progress...
I have spent so much extra time on all of my non-standard architectural details--like the bumpouts and this entryway--every step of the way!
I think the inside of the JayBee is starting to look like a spaceship.
I check on George a gazillion times a day. He's mostly sleeping in one spot...
...or another.
I have spent so much extra time on all of my non-standard architectural details--like the bumpouts and this entryway--every step of the way!
I think the inside of the JayBee is starting to look like a spaceship.
I check on George a gazillion times a day. He's mostly sleeping in one spot...
...or another.
Categories:
cats,
radiant barrier,
tiny house
Friday, August 25, 2017
Vapor Barrier & Radiant Barrier
When I had made the decision to install a fan in the bathroom, I left the vapor barrier open by the awning window in the gable peak above the bathroom, thinking that the vent for the fan might go there. But no, of course not. When I opened the fan I purchased and read the installation directions, it became clear that the fan had to be vented under the eave on the north wall--a wall I had already sealed up with the vapor barrier. Of course, because that is how this project (and my life) work.
Now, though, I have finally finished installing the vapor barrier on the walls of the bathroom.
Next up: Installing the radiant barrier on the ceiling.
For those who haven't been following along for years, I am using radiant barriers on all surfaces of the JayBee. A radiant barrier adds an extra 30% to the R-value of the insulation in a surface. The radiant barrier I installed on the walls is on the exterior underneath the housewrap. Since it is perforated and not a vapor barrier, I installed plastic on the interior as the vapor barrier. The radiant barrier I used under the subfloor and that I am installing on the ceiling is a bubble-wrap type that doubles as a vapor barrier.
I started with the easy stuff--the ceiling of the bathroom bumpout...
..and the ceiling of the bed alcove bumpout.
To prepare the radiant barrier for the ceiling, I cut long strips, and added a little extra to make each piece large enough to cover half of the ceiling.
Beginning to install the radiant barrier over the bed alcove and reading-nook/guest-room loft.
Now, though, I have finally finished installing the vapor barrier on the walls of the bathroom.
Next up: Installing the radiant barrier on the ceiling.
For those who haven't been following along for years, I am using radiant barriers on all surfaces of the JayBee. A radiant barrier adds an extra 30% to the R-value of the insulation in a surface. The radiant barrier I installed on the walls is on the exterior underneath the housewrap. Since it is perforated and not a vapor barrier, I installed plastic on the interior as the vapor barrier. The radiant barrier I used under the subfloor and that I am installing on the ceiling is a bubble-wrap type that doubles as a vapor barrier.
I started with the easy stuff--the ceiling of the bathroom bumpout...
..and the ceiling of the bed alcove bumpout.
To prepare the radiant barrier for the ceiling, I cut long strips, and added a little extra to make each piece large enough to cover half of the ceiling.
Beginning to install the radiant barrier over the bed alcove and reading-nook/guest-room loft.
Preparing a strip of the radiant barrier is pretty easy. Stapling the radiant barrier to the rafters is not very hard either. Covering every staple with tape, and sealing the radiant barrier to the plastic on the walls with tape--very time consuming.
I think installing the ceiling boards over this radiant barrier is going to be challenging. I like being able to see through the plastic on the walls--to see where all the framing is. Anticipating not being able to see through the radiant barrier while installing boards on the ceiling... hmm. We'll see how it goes.
Categories:
radiant barrier,
tiny house,
vapor barrier
Friday, July 10, 2015
West Wall 8
The top of the west end bumpout needed some roof rafters.
Cut roof rafters started piling up.
All but the corner rafters installed.
The corner rafters are complicated. Three edges have compound-angle cuts.
Finally, I had both corner rafters installed.
Next, I added a hurricane tie to each rafter.
Then I added blocking between each of the rafters.
Roof sheathing added.
Radiant barrier added to the west end.
Housewrap done up to the level of the bumpout roof!
Also see:
West Wall 1
West Wall 2
West Wall 3
West Wall 4
West Wall 5
West Wall 6
West Wall 7
West Wall 9
Once again, my yard is full of snakes. I keep startling them. And they keep startling me!
This morning before I got out of bed, I heard these little snaps outside the window. It sounded like twigs snapping. I thought it might be a deer, so I sat up and watched. Sure enough, just a few feet from the edge of the grass, this deer's head appeared. She was a young one. It's amazing how close they can get without being seen. The foliage around here is like a jungle!
A temporary détente.
Cut roof rafters started piling up.
All but the corner rafters installed.
The corner rafters are complicated. Three edges have compound-angle cuts.
Finally, I had both corner rafters installed.
Next, I added a hurricane tie to each rafter.
Then I added blocking between each of the rafters.
Roof sheathing added.
Radiant barrier added to the west end.
Housewrap done up to the level of the bumpout roof!
Also see:
West Wall 1
West Wall 2
West Wall 3
West Wall 4
West Wall 5
West Wall 6
West Wall 7
West Wall 9
Once again, my yard is full of snakes. I keep startling them. And they keep startling me!
This morning before I got out of bed, I heard these little snaps outside the window. It sounded like twigs snapping. I thought it might be a deer, so I sat up and watched. Sure enough, just a few feet from the edge of the grass, this deer's head appeared. She was a young one. It's amazing how close they can get without being seen. The foliage around here is like a jungle!
A temporary détente.
Categories:
cats,
framing,
housewrap,
radiant barrier,
roof,
tiny house,
walls,
wildlife
Saturday, July 4, 2015
Subflooring 3
It's about time I finished the floor!
Before my consultation with a plumber on Friday, I was catching up on all kinds of odd jobs. Staining more shingles; no pictures, just take my word for it. Bending thousands of staples over on the inside of the JayBee walls.
Cleaning out the JayBee.
All necessary but boring/thankless tasks.
After the plumber told me that the holes for the drain lines are more easily drilled through the completed subfloor, I jumped to get the floor done.
This end, the bathroom end of the JayBee, has looked like this for years.
I used clamps to hold the bottom on the bumpout until I could get it screwed in place.
After that was done...
...I started adding insulation to the bays. When the insulation batts are the exact size of the bays, this moves along quickly.
And Roxul is so easy to cut, even custom-cutting batts goes quickly.
After the insulation was installed, I added the radiant barrier.
Dale was kind enough to help get this plywood installed. I had the piece cut and in place, but I just could not get the groove engaged with the tongue on the adjoining sheet. With Dale's help, we got it done!
I'm particularly pleased with the end piece of subfloor. I cut a groove in the side of the piece--that fit perfectly over the tongue on the adjoining piece.
Subfloor is done!
Also see:
Subflooring 1
Subflooring 2
Before my consultation with a plumber on Friday, I was catching up on all kinds of odd jobs. Staining more shingles; no pictures, just take my word for it. Bending thousands of staples over on the inside of the JayBee walls.
Cleaning out the JayBee.
All necessary but boring/thankless tasks.
This end, the bathroom end of the JayBee, has looked like this for years.
I used clamps to hold the bottom on the bumpout until I could get it screwed in place.
After that was done...
...I started adding insulation to the bays. When the insulation batts are the exact size of the bays, this moves along quickly.
And Roxul is so easy to cut, even custom-cutting batts goes quickly.
After the insulation was installed, I added the radiant barrier.
Dale was kind enough to help get this plywood installed. I had the piece cut and in place, but I just could not get the groove engaged with the tongue on the adjoining sheet. With Dale's help, we got it done!
I'm particularly pleased with the end piece of subfloor. I cut a groove in the side of the piece--that fit perfectly over the tongue on the adjoining piece.
Subfloor is done!
Also see:
Subflooring 1
Subflooring 2
Categories:
insulation,
radiant barrier,
subflooring,
tiny house
Subscribe to:
Posts (Atom)