Showing posts with label drawings. Show all posts

Sunday, January 20, 2013

Pretending It's Spring (Pantry Cabinet 1)

Surprisingly, the day began with temperatures in the low 40s. Felt like the beginning of spring. Ha! I used the opportunity to hang out a JayBee-related gift I received for Christmas. Dale made me a birdhouse duplex that looks like the JayBee! Very cute.


I've had lumber, intended for a JayBee pantry cabinet, clogging up my house for a few weeks...


The warm temps today prompted me to open up the JayBee...


...and use my saws to cut the pieces for the pantry cabinet.


I ran out of time (I still have a few more pieces to cut) but I got a lot done and, by the end of the day, my house was stacked with cabinet pieces. (The piano hinges are sitting on top of the stack.) Also by the end of the day, the temperature had plummeted. This next week will be frigid. I guess it really isn't spring yet!


Below are a couple of my pantry cabinet drawings. This cabinet will be narrow and tall; it will sit in front of the water heater (see floor plan). The whole cabinet will be on wheels (that lock) so, when necessary, it can be moved out of the way for access to the water heater.


Also see:

Sunday, December 2, 2012

Project Recap

It seemed that the JayBee project was on a tiny roll during the autumn months, but that ended when winter cold moved in and I came down with a heavy cold. Even though I'm recovering from the illness part, the winter and the holiday season will keep me busy and away from making real progress on the JayBee for awhile.

I celebrated a birthday some days ago. Take a look at this unique and appropriate gift from my sister. She painstakingly colorized my JayBee drawing and then had the image put on a set of postage stamps. So cute! Also the perfect gift for someone who is diligently (and ever so slowly) downsizing (and doesn't need more "stuff").


As I was recently recapping the project in my mind--going over how far along things are and how much more there is to do--I went back and reviewed photos of the project thus far. Even though I've been a director and carpenter throughout, there are photos that surprise me--that make me think "I did that?!" or "However did that get done?!" Strange phenomenon, that. It's a good exercise--to review and remember; it provides inspiration, and also some reassurance that surely the rest will happen eventually too.


If you haven't followed the blog of the Little Yellow Door project, it is worth checking out. Ella built a Tumbleweed Fencl tiny house--and it's done! Ella's "The house that never ends..." post describes so well the paralysis that can set in when self-doubt and the fear and hugeness of the project are allowed to hold sway. Her completed project also so clearly demonstrates the reward that lies in overcoming the mental obstacles by making progress on one tiny piece at a time. Eventually, those pieces add up to a completed home!

I will use the winter months to move forward on these pieces:
- Drawings: I recently finished drawing the framing for the west end bumpout. I plan to complete plumbing and electrical drawings for the JayBee as well. (There are some plumbing bits that need to be done on the JayBee before the west end can be completely closed in.) I will draw the rest of the roof framing and I will calculate exactly where the vents (for the plumbing, the hot water tank, and the stove/heater) will pierce the roof.
- Cabinet Construction: I have drawn plans for a cabinet that will serve as a food pantry in the JayBee and I hope to make a little progress with constructing it this winter. (It will be a rolling cabinet so it can also serve as a wall in front of the hot water tank.) I have some ideas about a mini-cabinet/shelving unit that I want to build next to the JayBee's door to hold keys, mail, a charging station for my phone and iPod, etc. I will draw plans and possibly begin constructing that.
- Research: I will use the winter months to research and consult with some professionals who might help with JayBee construction. I think I'm going to hire someone to install the roofing on the JayBee once the framing and sheathing are done--the major reason being that I don't want to buy the tools it would take to cut the angle cuts on metal roofing. I need to find both a plumber and a electrician; I'd like to do the basics myself but use the professionals to ensure compliance with codes and to make the connections with utilities.

Don't worry; I won't be idle! As I come up with JayBee things of interest, I'll post them.

In the meantime, below are photos from a few recent walks with Bear and George. The dog in the last photo is the neighbor's dog that is allowed to run loose--much to my irritation and the terror of my cats. On a walk with George, I was surprised when he suddenly shot off and disappeared way up the railroad tracks. Well, he knew who would be bounding around the corner a moment later--the dog. She ran in circles trying to follow George's trail--but he was long gone way up the tracks to the left.


Saturday, November 10, 2012

East End Roof 3

Back to roof work today...

After I opened up the tarps on the east end of the JayBee and climbed up into the loft, I admired the view from the loft window.


I attached hurricane ties to each of the east end roof rafters. Here's a view of some of them from above; I was hanging out the loft window.


Here's a view of them from inside the JayBee.


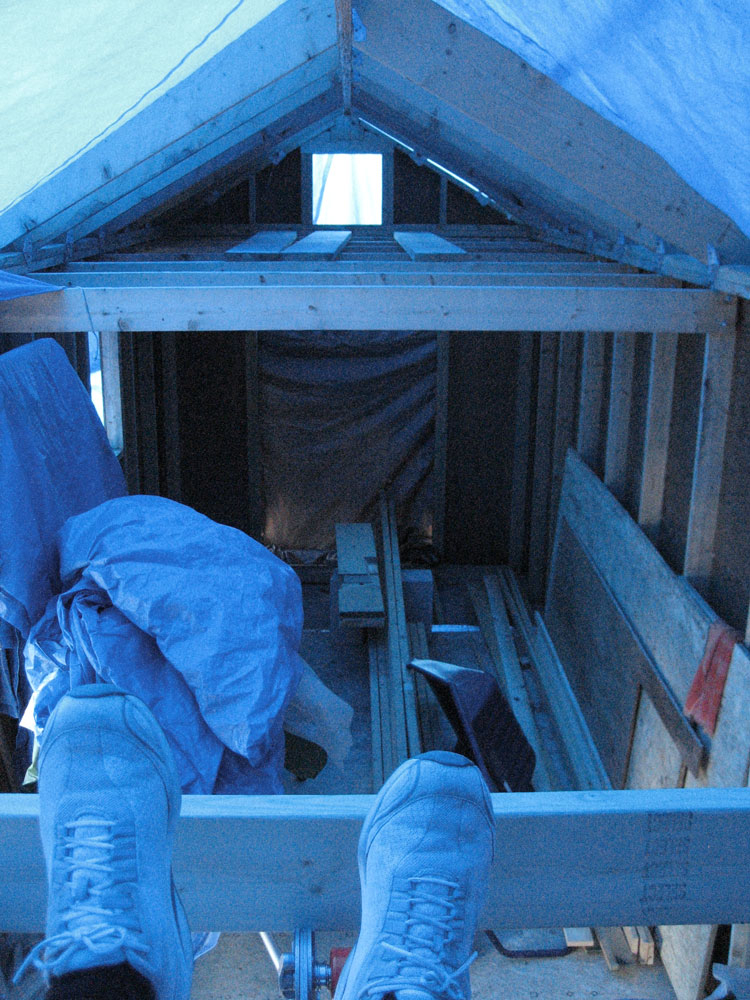
Here's the inside of the JayBee from the east end loft. It's quite crowded now that I've moved everything inside for the winter. It's hard to maneuver around things, and I've filled it with sawdust by sawing boards inside.


Given the mistakes I've made with angle cuts lately, I decided to create a cardboard template of the roof sheathing before sawing any plywood. Good thing. See the different angles below? The left line was my first thought, and would have been my first cut. The angled line on the right is the correct line.


After 2:00 today, frigid air swooped in. I lasted until 4:30 outside; that's all I could take. Back at it tomorrow.


Also see:


Tuesday, October 9, 2012

Bathroom Storage 2

Here's the bathroom cabinet all finished and in use. It won't sit on the floor of the JayBee; it will be hung on the wall. I decided to use it now not only to have a place to store it until the JayBee is ready for it, but also because it has been helping me downsize my bathroom crap. I've been trying to fit everything that isn't a tall bottle into this cabinet. I've been chucking everything else. Can you say prescriptions dating back to 1995? Yup, it's that bad.


In case anyone is wondering how I come up with these ideas, some of them I cook up completely from scratch (see the office corkboard wall); others, like this bathroom cabinet, start with a bit of inspiration to which I apply a bit of creative modification. The inspiration for this cabinet came from Ridiculously Simple Furniture Projects by Spike Carlsen. I found baskets that would fit in the space I knew I had in the corner of the JayBee's bathroom. I modified Carlsen's design to fit my baskets, to have solid shelves, and to have straight up-and-down sides rather than decorative molding around the top (to make it easier to install flush into the corner of the bathroom). Sometimes I draw accurate plans to scale; this time, I just did a quick sketch before starting to build. (The construction process is detailed in Bathroom Storage 1.)


Also see:

Monday, July 25, 2011

New Drawings

One of the things that has kept me busy for the last week or so was completely re-drawing all of the framing drawings for the JayBee. Before I could begin building walls, I needed up-to-date framing drawings that incorporated all the changes that have occurred since the trailer arrived (and I could take more accurate measurements) and I made some crucial framing decisions (like using 2 x 6 floor joists so none of the wheel wells would be above floor level on the inside), etc.

So, here's the new floor plan:


[If you click on the image, you can see a larger version of the floor plan in its own window.]

Thursday, March 10, 2011

JayBee Progress...or...Hope for Spring

Even though I haven't posted lately, I have been making slow and steady progress on my JayBee plans. My framing drawings are finally coming together. I was near to finalizing my windows and door when I got completely stalled because I couldn't find a window small enough for one of the two lofts. Still haven't completely resolved that issue yet. And I have written (but not yet submitted) my application for a "permanent campsite" permit. Next huge task: putting together a lumber order.

In the meantime, we had three solid days of rain earlier in the week. At first, it didn't seem to make a dent in the snowpack. When it was finally done, it was exciting to see that, indeed, the snowbanks had shrunk. We're in for a mix of snow and rain over the next few days. There is a bit of daylight left when I get home from work now, so we're mostly headed in the right direction!


Sunday, February 6, 2011

JayBee Floor Plan

I posted my latest drawing of the JayBee's floor plan today. Once again, I changed things a bit, so now the drawing of the southern elevation is out of date. (The left window and stove pipe will have to be moved further to the left in that drawing.)

About the floor plan:
- I know I'd have a larger living room if I slept in a loft, or used a Murphy bed, or used a smaller-than-queen-sized bed, or had a smaller kitchen...
- I don't want to set up my bed every night. While I could get into a loft right now, I know better than to count on that always being the case. When I dislocated my hip last January, I would not have been able to come home from the hospital and climb up into a loft to sleep. I don't like the thought of navigating a ladder to use the bathroom at night, either.
- Sleep does not always come easily to me. I need a full queen-sized bed for the tossing and turning I do. A nice side benefit to the queen-sized bed is all the underbed storage space I will have.
- The kitchen: While I think bar sinks and dorm-sized refrigerators, etc., are cute, I'd be happy using them on a daily basis for about three days. I do not eat out all the time; I eat at home. And I have people over for dinner on a regular basis. I need a good-sized refrigerator, sink, stove, and oven. My stove/oven also has a 40,000 btu heater on one side--the source of heat for my JayBee. There is no substitute for a large sink; when you need one, you need one. I have a nice, large cutting board that will cover half the sink--and add counter space--until I move it to make use of the whole sink.
- Loft space: The JayBee will have two lofts. The one over the bed will have a lot of head room because the loft joists will be only 5'10" above the floor. The living room area will have a cathedral ceiling. There will be a second loft--with much less head room--over the kitchen and bathroom.


Update:
I posted a new drawing of the floor plan on 25 July 2011. It corporates the changes I've made to the design since the first posting.

Saturday, February 5, 2011

JayBee's Southern Elevation

I re-drew the JayBee's southern elevation today--to incorporate the new information I've learned about the trailer, and to incorporate discoveries I made while drawing the framing for this southern wall. (I posted the drawing in the new "drawings" section in the right-hand navigation. Sorry you have to click twice in order to open the drawing in its own window; I couldn't figure out how to do it any other way.)

I did try to colorize the drawing in Photoshop. Oh, my goodness! I just had to stop. It would have taken me forever.

Notes about the southern elevation:
- yes, there will be steps (a small deck, in fact) in front of that door
- roofing is metal standing seam
- siding is cedar shingles
- it is hard to tell in this drawing, but the door is a step in from the outside edge of the trailer; this will be more obvious in the floor plan (which I will hopefully post this weekend as well)
- at this point, my vision of colors is that the roofing and vinyl outside of the windows will be a forest green; all the siding and trim, and the door, will be natural cedar color
- yes, I know that the convention is to have the tops of all doors and windows aligned; to the right of the door is a bed with a low loft above, which necessitates the lower placement of that window
- all my previous drawings of this elevation included a small window in the gable above the door but, no matter what size or shape, it looked wrong; it looks better to me without trying to squeeze a window in there
- my previous drawing did not include the trim boards at the outer corners and, frankly, I thought it looked better that way; I think the corner trim boards make sense for a house that may travel down the road, however...

Sunday, January 23, 2011

Long Time Comin'

Given the poor condition of my home when I purchased it in 1991, my plan was to build a home next to it and tear it down within a few years. It's almost 20 years later. What happened? Life did. So many chapters, so many challenges took precedence. I never completely lost sight of the plan...but it did repeatedly go into hibernation.

When I purchased this property, my plan was to build the new house into the hillside, a touch further north and away from the drop to the road than the current house. After living here all this time, though, I'm determined to put the new house where the current house is situated for one key reason--it's closer to the river view. This decision has prevented me from moving forward with construction these last few years because I just could not figure out how to develop a cost-effective living arrangement that would allow me to live on the land while tearing down the current house and building a new one…AND would not require me to live in a wreck of a structure during the process.

Over the years, I have drawn up plans for garages, studios, and various combinations of workshops, garages, and apartments. Although each design had its attractiveness, I just couldn’t begin work on any of them. The combination of the cost and complexity of each structure gave me pause, as did this nagging worry that, combined with the future house, I would end up with too much structure in total.

The new plan is to build a small home on a travel trailer, live in it near the current house (to make utility hook-up easy) while tearing down the current house and building a new one and, then, either keep/move the trailer home or sell it. I developed a project timeline that gave me until the end of January to decide whether the project was a go or no-go. After spending a lot of time researching trailers, I happened upon someone who can custom-build exactly what I need for a very reasonable price. Everything felt so right, I decided weeks ago that it’s a GO! My travel trailer is under construction right now and will be delivered this spring when the snowbanks are gone.

I am calling my house design the “JayBee.” As I work to finalize the plans, I keep tweaking and re-drawing. I have a feeling this will go on for weeks. During this process, I am also researching building materials. While 20 years of reading and researching have contributed to my thinking and my house design, I especially want to thank these businesses for providing inspiration and invaluable information: I took a housebuilding course at the Shelter Institute (www.shelterinstitute.com) during the winter weekends at the beginning of 1991. I use all that I learned during that course every time I work on any aspect of house design. Patsy Hennin, co-founder of Shelter, gave me advice and support when I participated in the real estate foreclosure auction through which I acquired my property. For the idea to use a travel trailer as the foundation of my JayBee, I credit the Tumbleweed Tiny House Company (www.tumbleweedhouses.com) for the inspiration. I have scoured through that web site several times, purchased Jay Shafer’s “The Small House Book” and Popomo plans, and studied both the book and the plans extensively. I don’t know if my JayBee will qualify as a "tiny" house, since it will be 26 feet long, but it is definitely inspired by Jay’s work.

Here’s where the JayBee will sit on my land. (I apologize for the weird shadow and color lines; I knitted two photos together to make this one.) The basketball pole/net will come down. And the two trees identified with red arrows will be cut. By the way, this is the hillside I had initially planned to build a house into—so I will have an opportunity to see just how it feels to live in this spot with the JayBee.


Below is the view I will have from the JayBee. Until it is torn down, the current house will block much of the river view. (The car shouldn’t be there under normal circumstances; right now, it’s parked on what is normally lawn in order to be out of the way of the snow-plow guy.) The Kennebec is covered in snow in the distance. Come spring, it will be wide-open blue again.