Showing posts with label pocket door. Show all posts

Saturday, December 4, 2021

Pocket Door Now Works!

One of the longest-running projects I've had in the JayBee is the pocket door and its wall leading into the bathroom. I built the door starting in 2012. I built the wall for it in 2015. I hung the door in 2016. I replaced the door stop for the wall with a removable one in 2020. (Hmm... This might be another entry in the "you know you're taking too long..." series.)

For years now, I've had the door tied to the door stop because the wall was not plumb so the door did not hang exactly in the middle and, because it hangs free from the top, it could easily swing from side to side and scrape the half-studs or even slam into them. Even when I warned visitors not to move the door, it was too tempting; everyone who sees it wants to operate it. So--I tied it down, to keep it from moving and getting damaged.


Most pocket doors are hung in a wall that is built with 2x6s. Every inch counts in a tiny house, so I purchased this kit that allowed me to install the door in a wall only 3.5" deep. It has half-studs reinforced with metal to accomplish this.


In the photo below, you can see that the door was hanging unevenly in the wall. This edge was too close to the righthand half-stud; the other edge was too close to the half-stud on the other side.


Now that the house is level, I could finally plumb up this wall. I removed the screws holding the base of the studs to the floor, moved the studs until they were plumb, and reattached them to the floor.

Then, I decided to make use of these occasional holes in the metal reinforcing on the sides of the studs.


I cut boards to length and put pocket-screw holes in the ends of them.


I used the boards to span between the two half-studs on each side of the wall.


Now the door slides back and forth in the wall without scraping and crashing.


For a little extra insurance, I wrapped each of the new boards with leftover strips of sill insulation.


Voilá! A functioning pocket door. Now the door can be moved in whatever direction makes it easiest for the plumber to do his work.

That's the great news! The plumber is back in touch, and he will be doing the rest of the plumbing work in about a week.


Also see:

Pocket Door 1
Pocket Door 2
Pocket Door 3
Pocket Door 4
Pocket Door 5
Pocket Door 6
Wall for Pocket Door
Pocket Door Wall Done!
Dubbing Around the Edges (includes new door stop for pocket door)


Friday, August 19, 2016

Pocket Door Wall Done!

I realized today that I could finish up the pocket door wall, now that the shower stall is permanently installed.

First, I installed the half-studs between the floor and the header.


Then, after a bit of a struggle (clearly this pocket-door hardware was not designed for a person to install a pocket door by themselves--but I've become a master of figuring out how to do things on my own), I hung the door! Bathroom door closed...


...and open! I'm a little concerned about how far above the subfloor the bottom edge of the door is. I think I did all my careful measuring for this wall back when I was sure I was going to install hardwood floors, and I thought there might be a lip/sill transition between the kitchen and bathroom floors. The door might be too high now that I plan to use porcelain tile on the floor. Hmmm...there's always something!


Also see:
Pocket Door 1
Pocket Door 2
Pocket Door 3
Pocket Door 4
Pocket Door 5
Pocket Door 6
Wall for Pocket Door


George has been more eager than usual to go for walks. He spends time pining in the driveway. Okay, a good part of the time he quickly shifts from pining to sleeping.


He eagerly runs down the driveway whenever he thinks there's a chance he might convince me to go for a walk.


Monday, August 3, 2015

Wall for Pocket Door

I switched my energy from installing shingles on the outside of the JayBee to installing interior walls inside the JayBee. The house needed interior walls if electrical wires were going to be run...

I started with the wall that will hold the pocket door that separates the kitchen and the bathroom. Here are the beginning pieces.


Normally, I would build the entire wall, then lift it and install it. Pretty quickly it became obvious that I would not be able to build the entire wall before installing it. There was just not enough maneuvering room inside the JayBee to do that.


First, I installed the 2x4 footer across the whole width of the JayBee. Even though the 2x4 should not be in the doorway, this helped me ensure that the wall was all in the same plane. Then I installed all the pre-assembled door-opening pieces. Then, I installed the stud on the far left, and installed the top plate.


I had made cuts up from the bottom of the footer before installing it, so cutting out the doorway part was easy to do it after the wall was done.


I cut the footer out from the doorway and installed the hardware on the header that will carry the pocket door.


The right/north side of the wall looks a bit strange. Normally, there would be a double stud that would extend from the end of the door hardware up in the header straight down to the floor. However, that double stud would directly bisect the space I plan to use to access the hot water heater from the bathroom side of the wall. Instead, I built a reinforced stud up at the top of the wall and then a strange-shaped piece for the middle of the wall that will serve as a door stop. This photo also shows the metal half-studs (leaning up against the wall of the bumpout) that I have not yet installed in this wall. They will go in after the shower stall is in place--or at least on the bathroom side of this wall. Once the half-studs are installed, the pocket door can be hung in the wall.


Thursday, May 7, 2015

Pocket Door 6

I was going to call this post "Pocket Door Done!" but then I realized that I only have the actual door done, not the wall and not the pocket-door-hanger parts, so <sigh>, I guess it's not quite done.

Here is the door after one coat of finish.


After three coats of finish on top of the stain and the hardware installed. (Sorry it kind of blends in with the plywood behind it. The door really is pretty. Really.)


Unfortunately, I have already put a good, long scratch in the door while wrestling around with it. Aarghh!

Also see:
Pocket Door 1
Pocket Door 2
Pocket Door 3
Pocket Door 4
Pocket Door 5

Wednesday, July 30, 2014

Pocket Door 5

Another rainy-day project I have done is work on the pocket door I made for the bathroom in the JayBee. I sanded the whole thing several times. Then I carved holes into the door to accommodate the hardware.

First, I carved the holes needed for the pull out handle that will go on the edge of the door.


Then I carved the two holes on either side of the door--for the side handles. Here's a rough hole about a third of the way through the process.


Here is the same hole, all done and ready for the handle.


A side handle set in place.


Both a side handle and the edge handle set in place.


I think I want to stain the door. Unfortunately, I think there are some glue stains on the door that I cannot sand off. How could I have been so careless?! I think of myself as being meticulously careful when working with glue--but the stains are there nonetheless. I have to keep pondering this one.

Also see:
Pocket Door 1
Pocket Door 2
Pocket Door 3
Pocket Door 4
Pocket Door 6


Friday, August 3, 2012

Pocket Door 4

Some of you may remember that, back during the winter, I started to build a pocket door for the JayBee. (See Pocket Door 1, 2, 3.) I stopped attending my woodworking class about half way through because I was spending most of my evening hours at work. When I stopped working on it, the pocket door consisted of all of its parts--rails, stiles, and panels. Those parts have been cluttering up my house ever since.

Today I thought: I'll assemble the pocket door today. I have all the parts. How hard can it be? Uh huh, right.

First, I had to drill all the holes for the dowel connectors. I had purchased a tool specially made to help with the drilling of these holes, but it kept slipping. I gave up on the tool and drilled the holes by hand--hoping, of course, that everything would line up correctly and easily.


Door assembly turned into a painstaking process. I'm sure it didn't help that it was a very humid day today. (Some future dry day when my pocket door loosely rattles, I'm going to shake my head remembering this assembly day.)

I had to use the table saw to widen a few channels by just a smidgen. I had to use a chisel to shave a skosh off here, there, and everywhere. Slowly, the door started coming together.


After all this time, the panels had warped a bit, so they took some convincing to set in place. I ended up "convincing" all the various parts to go together by pounding on them with a block and hammer. Hours later, voilĂ ! Here it is all clamped and weighted.


Isn't it a thing of beauty? It feels like a real door, too--quite hefty. Mostly done. Now all it needs are inlaid handles on the sides and edge (already purchased), hanging hardware (already purchased), stain, and finish.


Also see:
Pocket Door 1
Pocket Door 2
Pocket Door 3
Pocket Door 5
Pocket Door 6


Monday, March 19, 2012

Pocket Door 3

Pocket door progress plods along...while I also try to recover from a heavy cold and bronchitis.

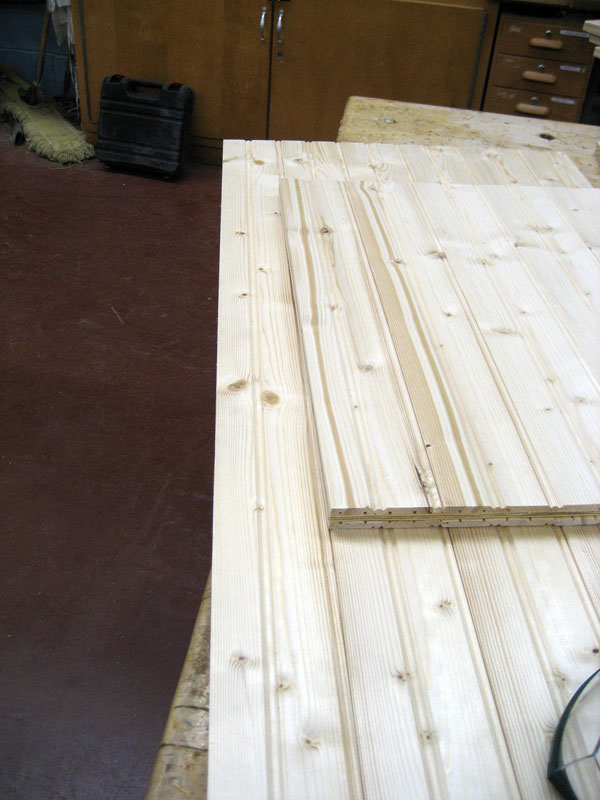
Once the rails dried, I began fitting the panels into them.


I used biscuits to help assemble the door stiles.


Next step: Drill the dowel joints to connect the door stiles and rails. Stay tuned...


Also see:
Pocket Door 1
Pocket Door 2
Pocket Door 4
Pocket Door 5
Pocket Door 6


In the meantime, spring is here. The river ice is gone, and some days have been unseasonably warm. Family walks are happening again.


Sunday, February 26, 2012

Pocket Door 2

In class, I used a table saw (one of those really nice Saw Stop ones--that stop instantly if any flesh comes into contact with the blade, not that I would aim to do that, of course :-) to make rabbet cuts on the pocket door rails and stiles.


I also trimmed the sides of the panels.


At home, I made biscuit cuts in the rails...


...then dry fitted the pieces with biscuits.


I glued and clamped the two halves of each of the rails.


Also see:


In the meantime...

We have had enough warmer weather on and off that the river is starting to open up.


The ice has moved around enough that the neighbor's Christmas tree is now in front of my house.