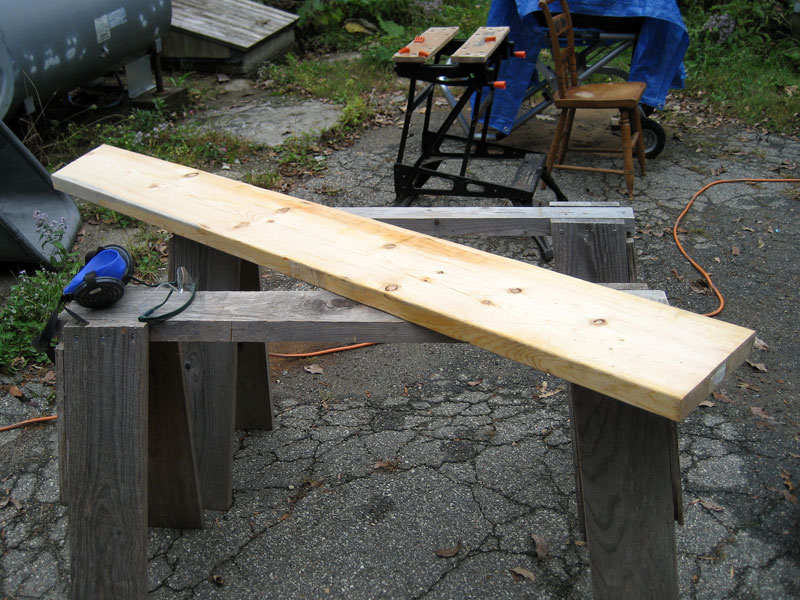
I know many of you have been wondering if I'm making any progress and if I'll have a roof on the JayBee before the snow flies. Believe me, I'm wondering too...
Two weekends ago, it poured all weekend. I made no progress on the rafters for those two days. After going out to the JayBee to pour accumulated water off of the tarps covering the house about eight times each of those two days, I finally figured out a way to prop up and weight down the tarps so they stopped accumulating water.
The new method worked through the pouring rain at the beginning of the following week. Then...very strong, gusty winds blew the tarps off the house--even though there were rocks and bricks hanging on the grommets around the edges. (No one's been hit in the head with a brick yet--even if I occasionally walk into one ;-) --and, thankfully, there's no glass yet installed in the JayBee.)
Do you see the tail end of our little buddy in this next shot?
Last weekend was unseasonably HOT and sunny all weekend. I worked on roof rafters all weekend. Due to the great weather, there were a lot of boaters out on the water, and these little railway carts went by as well.
Here's another moon-on-the-water shot from that weekend.
At the end of a complete weekend of working on rafters, what did I have done? ONE three-foot rafter. Why only one? I went up and down the ladder a gazillion times, cut many pieces of wood, even had the rafter installed at one point only to have to remove it completely and start over. The multiple compound angle cuts are giving me fits. I think I understand now why people don't frame roofs this way.
Bear slows me down as well. When I'm up on the ceiling joists, he endlessly whines and cries--until he figures out how to climb up and join me--and get in my way.
When I climb down to cut a board, Bear whines and cries until he figures out how to get back down--and get in my way.
Since we had a couple more days of rain this week, I was pleased to see this morning that almost no water had gotten inside the JayBee--even though the tarps had begun to blow off in the high winds that arrived during the night.
When I lifted my gaze above floor level, though, I gasped. Look at how much water collected in one of the tarps!
There was no way to lift this up over the top plate to drain it, so I put a garbage can under it and popped a hole in the tarp to drain it.
As the water drained and the strong winds continued to blow, the tarp kept shifting and lowering even more.
While the water was draining, I replaced all the GRK fasteners that secure the wall bottom plates to the headers over the wheel wells with longer screws. I'd been meaning to do that for some time, so it felt good to finish that. Over two hours later, the water was finally completely drained, and I poured it out of the JayBee. (It amounted to one and a third garbage cans full!)
I spent awhile repositioning the tarps and re-anchoring them with bricks, etc.
Finally, I continued work on another rafter I began to cut last weekend. In the following photo, I was trying to position my compound miter saw for a cut--until I realized it would not be able to make the cut I needed.
So, I made the cut with the hand saw.
A bunch more trips up and down the ladder, and then I made some more hand cuts.
I was up on the ceiling joists, finally beginning to install this rafter, when I felt rain drops. I sensed that this was going to be bad, so I rushed to cover the roof with tarps. Thank goodness I moved fast because next came a big clap of thunder. I was thinking, "Oh great. Here I am sticking up above the roofline of my house wrestling with tarps--just where the lightning is likely to find me!" Just as I was finishing securing the tarps, the sky opened up; water and HAIL rained down. (If you have any trouble seeing the hail in this next shot, click on the image to see a larger version of the photo.)
By the time I covered my miter saw, it was already drenched. First time it's ever gotten wet. I was drenched, too, but as soon as the rain stopped I got back to installing the rafter. I finished the installation, but it was too dark by then to snap a photo.
::: sigh ::: I'm trying, but progress is moving at a snail's pace these days.
Also see:
Roof Rafters 1
Roof Rafters 2
Roof Rafters 3
Roof Rafters 5
Roof Rafters 6
Roof Rafters 7
Roof Rafters 8
Roof Rafters 9
Roof Rafters 10
Roof Rafters 11
Roof Rafters 12
Roof Rafters 13
Roof Rafters 14
Roof Rafters 15
Roof Rafters 16
Roof Rafters 17
Roof Rafters 18
Roof Rafters 19
Roof Rafters 20
Roof Framing Wrap-Up
Saturday, October 15, 2011
Friday, September 30, 2011
Roof Rafters 3
I began the day by peeling back the roof tarp on the west end of the JayBee so I could continue the rafter work. After last night's downpour, today was sunny and windy. Very windy. Quiz question: What will fill the JayBee this time of year if the house is left without a cover--even more so on a windy day?
Those who answer "leaves" are correct! In addition to the leaves that collected in the JayBee today, there were also red berries dropping and schmooshing everywhere. Very pleasant.
Once I climbed up onto the ceiling joists on the west end of the house, I noticed how nice the view is from there. If there was not a house in the way, the river view would be great.
The insect world ruled today. I was visited and sometimes hounded by several species. Many hornets and bees...
...a couple of cicadas (Can you find the one in the photo below? No, it's not the hornet. It blends in with the leaves behind it.). This photo also shows some of the berries that have not yet fallen and squished inside my house.
I think of this kind of bug (below) as a "stink bug." I don't really know its official name.
These dragonflies (below) were so "occupied," I had some difficulty dislodging them from my shoe.
I began the day with five more sets of rafters ready to install. I fastened the first set,
and then fastened two more sets in the west end of the house.
Dale arrived to help, and he offered to take some photos of me installing two sets of rafters in the east end of the house.
Now the easier stuff is done. What's left (as far as roof rafters go) is to figure out the east and west end roof overhangs, and the north- and south-facing gable peaks. Lots of compound angles to figure out and cut.
Also see:
Roof Rafters 1
Roof Rafters 2
Roof Rafters 4
Roof Rafters 5
Roof Rafters 6
Roof Rafters 7
Roof Rafters 8
Roof Rafters 9
Roof Rafters 10
Roof Rafters 11
Roof Rafters 12
Roof Rafters 13
Roof Rafters 14
Roof Rafters 15
Roof Rafters 16
Roof Rafters 17
Roof Rafters 18
Roof Rafters 19
Roof Rafters 20
Roof Framing Wrap-Up
Those who answer "leaves" are correct! In addition to the leaves that collected in the JayBee today, there were also red berries dropping and schmooshing everywhere. Very pleasant.
Once I climbed up onto the ceiling joists on the west end of the house, I noticed how nice the view is from there. If there was not a house in the way, the river view would be great.
The insect world ruled today. I was visited and sometimes hounded by several species. Many hornets and bees...
...a couple of cicadas (Can you find the one in the photo below? No, it's not the hornet. It blends in with the leaves behind it.). This photo also shows some of the berries that have not yet fallen and squished inside my house.
I think of this kind of bug (below) as a "stink bug." I don't really know its official name.
These dragonflies (below) were so "occupied," I had some difficulty dislodging them from my shoe.
I began the day with five more sets of rafters ready to install. I fastened the first set,
and then fastened two more sets in the west end of the house.
Dale arrived to help, and he offered to take some photos of me installing two sets of rafters in the east end of the house.
Now the easier stuff is done. What's left (as far as roof rafters go) is to figure out the east and west end roof overhangs, and the north- and south-facing gable peaks. Lots of compound angles to figure out and cut.
Also see:
Roof Rafters 1
Roof Rafters 2
Roof Rafters 4
Roof Rafters 5
Roof Rafters 6
Roof Rafters 7
Roof Rafters 8
Roof Rafters 9
Roof Rafters 10
Roof Rafters 11
Roof Rafters 12
Roof Rafters 13
Roof Rafters 14
Roof Rafters 15
Roof Rafters 16
Roof Rafters 17
Roof Rafters 18
Roof Rafters 19
Roof Rafters 20
Roof Framing Wrap-Up
Categories:
framing,
kennebec river,
roof,
tiny house,
weather,
wildlife
Sunday, September 25, 2011
Roof Rafters 2
Today was very summer-like--bright, hot, humid. I was in shorts and a t-shirt, and too hot at that. No rain, though; great day for working on the house.
Before I began, I tied open the tarps covering the doorway and windows. The wildflowers behind the JayBee (to the north) are quite pretty at the moment. The bees were appreciating them a lot today.
I began rafter installation by hanging a joist hanger centered over every 24" o.c. stud in the west end of the house. (I had originally intended that these joist hangers would attach each rafter to the ridge board. What was I thinking?! They would never work for that. So, I switched things around. These will hold the tail ends to the walls. The hurricane ties I purchased as wall connectors will actually attach the upper ends to the ridge board; I'll use one on each side of each rafter.) I used three nails and one screw on each hanger. (Nails have more shear strength than screws.)
I put some boards on top of the ceiling joists--to give me something to stand on.
I wrestled the first rafter into place. Just sitting there--without fasteners yet--it looked kind of perfect.
It got more complicated as I began to fasten the rafters because the weight of one rafter deflects the ridge board just enough to make it hard to attach the rafters straight and square. Clearly they have to be installed in pairs. Finally, I had the first pair fastened.
I cut four more rafters...
...and installed them.
The beginning of a roof!
Before I began, I tied open the tarps covering the doorway and windows. The wildflowers behind the JayBee (to the north) are quite pretty at the moment. The bees were appreciating them a lot today.
I began rafter installation by hanging a joist hanger centered over every 24" o.c. stud in the west end of the house. (I had originally intended that these joist hangers would attach each rafter to the ridge board. What was I thinking?! They would never work for that. So, I switched things around. These will hold the tail ends to the walls. The hurricane ties I purchased as wall connectors will actually attach the upper ends to the ridge board; I'll use one on each side of each rafter.) I used three nails and one screw on each hanger. (Nails have more shear strength than screws.)
I put some boards on top of the ceiling joists--to give me something to stand on.
I wrestled the first rafter into place. Just sitting there--without fasteners yet--it looked kind of perfect.
It got more complicated as I began to fasten the rafters because the weight of one rafter deflects the ridge board just enough to make it hard to attach the rafters straight and square. Clearly they have to be installed in pairs. Finally, I had the first pair fastened.
I cut four more rafters...
...and installed them.
The beginning of a roof!
Also see:
Categories:
framing,
plant life,
roof,
tiny house,
weather
Saturday, September 24, 2011
Roof Rafters 1
Even after the rain stopped this morning, the day remained very dark and very humid.
I spent the morning in the JayBee, reading roofing chapters in books...
...and drawing a rafter template on the floor of the JayBee. (In the photos below, I enhanced the lines of my drawings in Photoshop so you can see them.)
I am using 2x10s for my rafters. That's much more rugged than is required structurally; I want the added depth in order to install a lot of insulation in the roof.
I cut the peak end of a rafter (left end in photo below) with the miter saw and drew the tail cuts.
I cut the tail-end cut and most of the bird's-mouth cut with the circular saw and then finished the bird's mouth with the hand saw.
I then made sure the rafter matched the drawn template.
I cut another rafter to match--so I now have one as a template and one I can use to install and make sure the template is right. Hopefully tomorrow I will install my first roof rafter!
Also see:
Roof Rafters 2
Roof Rafters 3
Roof Rafters 4
Roof Rafters 5
Roof Rafters 6
Roof Rafters 7
Roof Rafters 8
Roof Rafters 9
Roof Rafters 10
Roof Rafters 11
Roof Rafters 12
Roof Rafters 13
Roof Rafters 14
Roof Rafters 15
Roof Rafters 16
Roof Rafters 17
Roof Rafters 18
Roof Rafters 19
Roof Rafters 20
Roof Framing Wrap-Up
I went on an eagle hunt late in the day. At least one eagle had been calling all day down by the river, so I went to see if I could spot it. I found more mushrooms (so added photos to yesterday's post) and signs that fall foliage colors are on their way.
When I got down to water's edge, I startled the eagle (who was directly overhead) who then startled me as it took off--so I didn't get a photo of it.
Guess who joined me?
I spent the morning in the JayBee, reading roofing chapters in books...
...and drawing a rafter template on the floor of the JayBee. (In the photos below, I enhanced the lines of my drawings in Photoshop so you can see them.)
I am using 2x10s for my rafters. That's much more rugged than is required structurally; I want the added depth in order to install a lot of insulation in the roof.
I cut the peak end of a rafter (left end in photo below) with the miter saw and drew the tail cuts.
I cut the tail-end cut and most of the bird's-mouth cut with the circular saw and then finished the bird's mouth with the hand saw.
I then made sure the rafter matched the drawn template.
I cut another rafter to match--so I now have one as a template and one I can use to install and make sure the template is right. Hopefully tomorrow I will install my first roof rafter!
Also see:
Roof Rafters 2
Roof Rafters 3
Roof Rafters 4
Roof Rafters 5
Roof Rafters 6
Roof Rafters 7
Roof Rafters 8
Roof Rafters 9
Roof Rafters 10
Roof Rafters 11
Roof Rafters 12
Roof Rafters 13
Roof Rafters 14
Roof Rafters 15
Roof Rafters 16
Roof Rafters 17
Roof Rafters 18
Roof Rafters 19
Roof Rafters 20
Roof Framing Wrap-Up
I went on an eagle hunt late in the day. At least one eagle had been calling all day down by the river, so I went to see if I could spot it. I found more mushrooms (so added photos to yesterday's post) and signs that fall foliage colors are on their way.
When I got down to water's edge, I startled the eagle (who was directly overhead) who then startled me as it took off--so I didn't get a photo of it.
Guess who joined me?
Categories:
cats,
framing,
plant life,
roof,
tiny house,
weather
Subscribe to:
Posts (Atom)