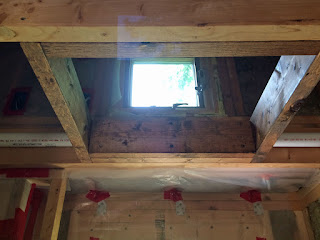
I took advantage of the cooler, rainy weather yesterday to work inside the JayBee. I decided to frame in the hatch opening in the bathroom ceiling. The hatch will allow me to operate the awning window in the west end loft by reaching up through the bathroom ceiling without having to crawl down the length of the loft to reach it. (I am formulating a plan to embed some foot- and hand-holds near the bathroom sink to make it easy to step up and operate the awning window.)
The challenge to putting in this framing is the vent pipe that runs along one of the ceiling joists where the framing goes.
Here are two pieces of framing cut to fit around the pipe.
And loosely set in place to be sure they will fit correctly.
Another piece of framing, with space carved out to conceal the vent pipe.
And more.
Here are all the framing pieces as they will fit together when installed. (Added bonus: I cut all of these pieces from pieces I had originally mis-cut as rafters.) The top edge has a three-quarter-inch inset so the structure of the hatch door has room to sit below the level of the loft floor.
I ran out of light yesterday, so I did the final installation of the framing pieces today. I stained and installed the hatch framing.
I plugged the screw holes.
Finally, I trimmed the pegs and stained them. Done!
Now I'm thinking of installing a loft hatch in the other loft. It would give me the option of opening the east-end loft's awning window without climbing up into the loft, and it would add some air circulation through the bed area when I want it.
Also see:
Loft Hatch 2


No comments:
Post a Comment