Saturday, April 21, 2012

Trash Bin

My apologies to my loyal followers for my long silence. It would be great if I could tell you I have made all kinds of progress on the JayBee. Unfortunately, even though the weather has been unseasonably sunny and warm, I have done absolutely nothing new on the JayBee. I'm pretty much living at work these days, I had bronchitis for four weeks, I had a relative in the hospital and a rehab center for weeks, and I've been avidly following my son's thru-hike on the Appalachian Trail (and also updating the maps on his blog). Yes, I realize this is starting to sound like "my dog ate my homework." Let's just say that life has been happening every day, all day.

This week I took delivery of a ready-to-assemble trash bin. It may seem that a trash bin would have nothing to do with the JayBee, but it is actually a part of the bigger picture. The trash bin will give me a place to store recyclables and trash without having to have a place for them in the JayBee.

After I unpacked the two large boxes, I had the ready-to-assemble trash bin parts...


and I had a substantial amount of packing material to recycle.


First, I attached the sides of the bin to the bottom.


Then I attached the two back pieces.


Next came the top front piece.


I installed the hinged lid on top.


Attaching the doors was a little tricky (it was hard to hold them in place and attach them at the same time), but I got it done.


I leveled cinder blocks off to the side of the bottom of the driveway as a place to set the trash bin. I realize the cinder blocks under the front edge make the thing look a little like it's up on stilts. This strategy saved me some trouble with excavating hard-packed clay out of the hillside. More importantly, I'm hoping it will make it easier to open the trash bin doors as next winter's snow piles up.


I guess I can take longer to replace my falling-apart plastic trash can, now that it has a roof over it. Notice that the bin has lots of room for recyclables.


Guess who had to check things out!


Update 29 Apr 2012: Steve was up this weekend and caught me applying a preservative to the trash bin. I used stuff left over from when I applied it to the deck. I've used different products over the years, and this stuff actually lasts a few years--yes!


Monday, March 19, 2012

Pocket Door 3

Pocket door progress plods along...while I also try to recover from a heavy cold and bronchitis.

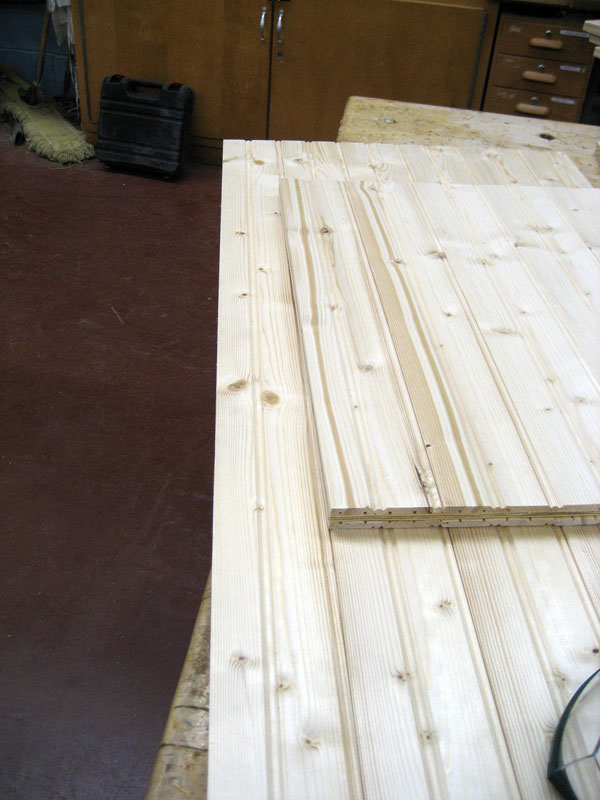
Once the rails dried, I began fitting the panels into them.


I used biscuits to help assemble the door stiles.


Next step: Drill the dowel joints to connect the door stiles and rails. Stay tuned...


Also see:
Pocket Door 1
Pocket Door 2
Pocket Door 4
Pocket Door 5
Pocket Door 6


In the meantime, spring is here. The river ice is gone, and some days have been unseasonably warm. Family walks are happening again.


Sunday, February 26, 2012

Pocket Door 2

In class, I used a table saw (one of those really nice Saw Stop ones--that stop instantly if any flesh comes into contact with the blade, not that I would aim to do that, of course :-) to make rabbet cuts on the pocket door rails and stiles.


I also trimmed the sides of the panels.


At home, I made biscuit cuts in the rails...


...then dry fitted the pieces with biscuits.


I glued and clamped the two halves of each of the rails.


Also see:


In the meantime...

We have had enough warmer weather on and off that the river is starting to open up.


The ice has moved around enough that the neighbor's Christmas tree is now in front of my house.


Sunday, February 12, 2012

Pocket Door 1

With exterior work on the JayBee in hibernation this winter, I decided to use the time to work on some interior pieces. I signed up for an adult education woodworking class so I'd have access to an indoor shop with lots of fine tools and expert advice. (One challenge of the class is transporting lumber in my small car every week, since we don't get to store our projects in the shop.) My strategy for the larger projects will be to cut and fit in the shop and then assemble and glue up at home.

My first project is to build the door that will slide into a pocket between the bathroom and kitchen in the JayBee. I found some excellent pocket-door hardware that works in a 2" x 4" wall; very exciting, since I thought I was going to have to make a 6" deep wall to accommodate a pocket door. (Every inch in a tiny house counts for a lot!) Even though the JayBee has only one interior room door, I've designed a style that I hope to repeat on cupboard and closet doors, and on the underbed storage drawers as well, so that the whole tiny place has a similar look and feel throughout.

Step one: I committed my idea to paper and figured out dimensions and a cut list.


Step two: I purchased the wood and brought it to class.


Step three: I cut all the pieces in under an hour in class. It's amazing how much can be accomplished in a short period of time when you have a large space to work in and all the tools already set up.


The course instructor helped me decide on a strategy for creating the panels for the door. We agreed that I would attempt to assemble the door panels at home before the next class.

Step four: I cut some 1/4" plywood (outdoors, in the spitting snow!) to use as the innermost layer in the door panels...


...and then turned my kitchen table into a glue-up station for the panels...


...using cinder blocks as "clamps."


Now I have the two panels for the door ready to take to class in a few days. Both sides of each panel have the same look.


Next step is to cut the rabbet joints on the door stiles and rails, and drill holes in the stiles and rails for the dowel joints. Stay tuned...


Also see:
Pocket Door 2
Pocket Door 3
Pocket Door 4
Pocket Door 5
Pocket Door 6


Sunday, January 22, 2012

Organizing Paperwork

I worked this weekend on organizing papers, drawings, receipts, etc. related to the JayBee project. While I was at it, I created a new Downsizing Chronicles page on this blog, and I updated the Costs page as well.

My return from the grocery store today just happened to coincide with the moment an eagle chose to circle overhead and land in one of trees along the river. Without any leaves on the trees (and since I happened to have my camera with me!), I was able to snap a shot.

Sunday, January 15, 2012

Downsizing

This last week, the weather changed from pretend winter to real winter--snow, freezing rain, temperature below zero this morning. The river is finally frozen over--see the new logo photo! All of this does not invite working outside on the JayBee. Thankfully, the JayBee is holding its own under cover so far.


Lately I've had energy for getting rid of stuff. This week I gave away all of my back issues of these magazines: Fine Woodworking, Mother Earth News, Nature Conservancy, Outside, Smithsonian, and This Old House. Just under 350 magazines! The other thing I did was consolidate all of my DVDs into a thick notebook. Now I have over 70 DVD cases to give away. I do feel like I'm on a roll, but I will have to continue divesting myself of this much stuff every week for many weeks in order to be ready to move into the JayBee. Even if I do have a storage building.

And I will have a storage building. I ordered a pre-cut kit for a storage building this week as well. Now, to find just the right place to assemble it this spring...

Sunday, January 1, 2012

New Year's Musings

So today starts a new year. This should be a new beginning, should it not? Funny that, because I've had significant new starts in my life, and all of them occurred due to events far more significant than the flip of a calendar page. Even so, this new year causes me to take stock.

I am not one for making New Year's resolutions; I can be too complicated and sometimes self-defeating to make simplistic resolutions work. I have been thinking a lot about the interplay between living in the moment, having dreams, and making plans. If I spend too much time dreaming and planning, I can miss out on the only thing guaranteed to me--this moment, now. If I spend all my time in the moment, I might not accomplish much. Because isn't it the pursuit of the reward of completing a project (in the future, like the JayBee) that helps me persist through all the moments that are discouraging and wearying--that are not all that fun in the moment? I've been wondering if it's possible to be more in a moment--even a discouraging one--in a way that also keeps me on track (as opposed to derailed) when trying to achieve a goal.

Amidst all of these thoughts today, I attempted to make a little progress on the tiny house...

After three bitter-cold days, today was warmer again. It's quite a dramatic weather roller-coaster ride we've been on. The JayBee was dry and well-covered. Even though the day was sunny, the sun is low in the sky this time of year; it casts a long-shadowed light no matter the time of day.


I made a new sign to display over the septic pump. My hope is that this will help the plow guy avoid breaking the pump when he plows my driveway. (Yes, hope springs eternal. I've had other versions of the sign out there, and they have not yet succeeded in fully protecting the pump.)


It took me hours today to install new blades on my two power saws. I put the blade I received as a Christmas gift (thank you, Dale!) on the table saw. That job went fairly quickly and easily.


I found a brand-new, never-before-opened-or-used blade when I cleaned out space for storing the JayBee windows. A spare blade I'd completely forgotten I purchased back when I bought my miter saw. (As if I needed it, this is more evidence that I need to continue doing some serious downsizing. What is the point of having a bunch of stuff if I don't know I have it and, therefore, am unlikely to stumble upon it and make use of it?!) It took me a long time to install the new blade on my miter saw, but finally the job was done.


It is going to be heaven the next time I use these saws. Happiness is a sharp saw blade.

It was too nice a day not to go for a walk with the boys and get a river fix. Check out my driveway! Since it slopes down to the north, it will probably be ice-covered until the spring thaw. :::sigh:::


Down at river's edge...


This small airplane flew downriver at low altitude.


For some reason, I thought the plane might have something to do with the smoke I saw downriver (see just right of center in the photo below). On second thought, there probably was no connection.


Happy New Year, everyone!