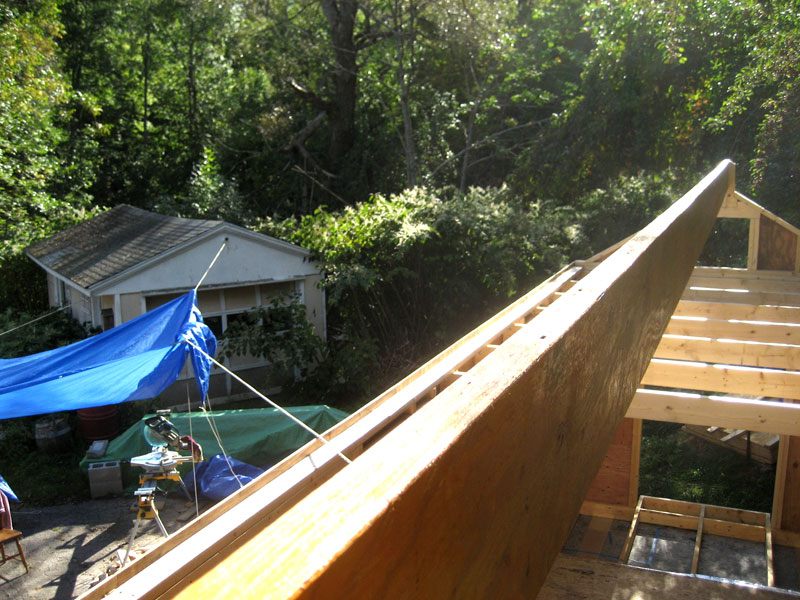
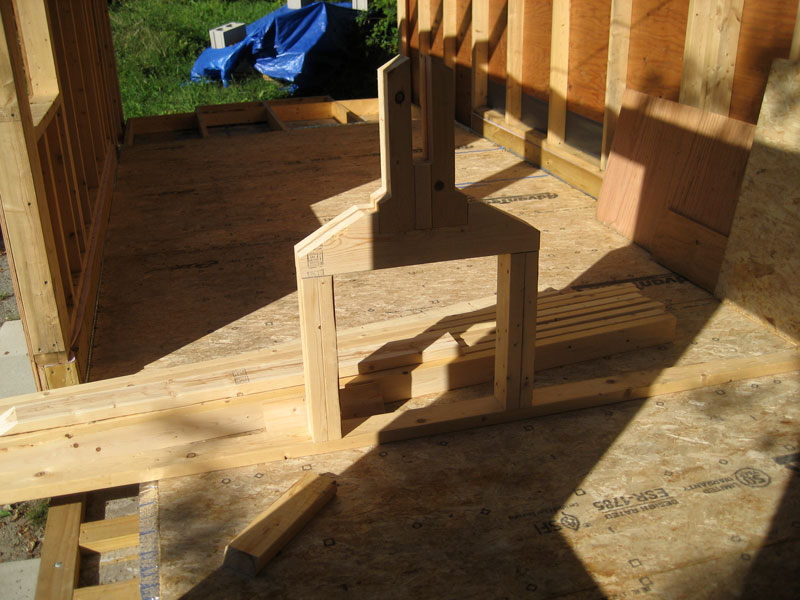
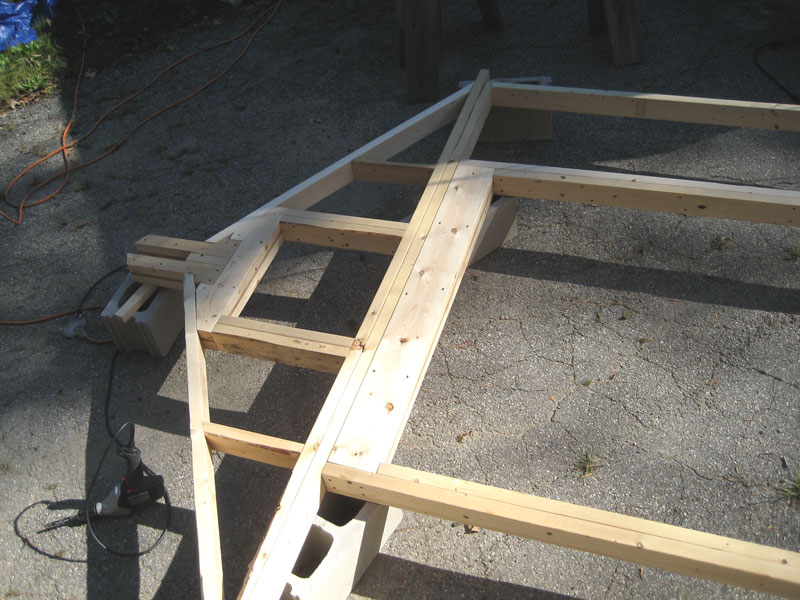
Immediately after we had the west wall in position, we were eager to install the ridge board. Up until now, the ridge board has sat covered and anchored in my yard.
First, Dale and Arlen carried the ridge board to the west end of the house, passed it up through the loft window, and set it down on the ceiling joists.
Arlen climbed up onto the east-end ceiling joists to set that end of the ridge board in place.
Then Arlen climbed up onto the west-end ceiling joists to set that end of the ridge board in place.
Done! This is SO exciting! A momentous milestone in this project.
Doesn't this next shot make the house look like a toolbox?
We are not expecting rain tonight or tomorrow but I was very eager to take advantage of this easier way to keep water OUT of the JayBee.
Saturday, September 17, 2011
West Wall 4
Strange start to the day. Look what I found in the middle of my road! I am very puzzled as to just how this poor guy ended up there in this shape.
He clearly had a major wound at some point--from a boat propellor maybe?
Bear found this find quite fascinating.
I knew the perfect person to give this turtle shell to--Dale! He loves stuff like this.
Today was West Wall Day! This is how the JayBee looked first thing today--after collecting a bunch of rain a few days ago. (What's new?)
Once all the water was poured out of the house and the tarps dragged out, the new wall could go up.
Arlen and Dale came over to raise the west wall.
The wall fit in place amazingly easily. Such a relief! It only needed a little convincing with a sledge hammer. :-) Once we made the wall square with the two adjacent walls, and made it plumb, we fastened it.
Next step: The Ridge Board!
Also see:
West Wall 1
West Wall 2
West Wall 3
West Wall 5
West Wall 6
West Wall 7
West Wall 8
West Wall 9
He clearly had a major wound at some point--from a boat propellor maybe?
Bear found this find quite fascinating.
I knew the perfect person to give this turtle shell to--Dale! He loves stuff like this.
Today was West Wall Day! This is how the JayBee looked first thing today--after collecting a bunch of rain a few days ago. (What's new?)
Once all the water was poured out of the house and the tarps dragged out, the new wall could go up.
Arlen and Dale came over to raise the west wall.
The wall fit in place amazingly easily. Such a relief! It only needed a little convincing with a sledge hammer. :-) Once we made the wall square with the two adjacent walls, and made it plumb, we fastened it.
Next step: The Ridge Board!
Also see:
West Wall 1
West Wall 2
West Wall 3
West Wall 5
West Wall 6
West Wall 7
West Wall 8
West Wall 9
Monday, September 12, 2011
West Wall 3
Note: I have revised my previous post--West Wall 2--to describe a good "duh" moment.
Fourth day in a row with sunshine and no rain! Since I managed to get myself home from work with an hour of daylight left, I took advantage of it. I cut and attached more sheathing to the west wall.
There wasn't much light left as I packed things away. Another great moon tonight!
Fourth day in a row with sunshine and no rain! Since I managed to get myself home from work with an hour of daylight left, I took advantage of it. I cut and attached more sheathing to the west wall.
There wasn't much light left as I packed things away. Another great moon tonight!
Also see:
Categories:
framing,
kennebec river,
tiny house,
walls,
weather
Sunday, September 11, 2011
West Wall 2
These are the west-wall pieces I had at the beginning of the day. The window frame was square and the ridge-board-holder was solid and straight, so I hadn't dismantled them.
After so much rain this past week, this day seemed blue, blue, blue. Check out this sky! (Find the plane.)
The water was very blue, too. (See it behind Bear? No, not the blue tarps; the river beyond them.)
Not to be outdone, George did a lot of hanging out in the JayBee today as well.
I listened to tenth-anniversary-of-9/11 coverage while I worked today. There were times I just stopped working and sat and cried. Even still, I managed to keep plodding along.
I decided to start by building the straight wall pieces.
These two pieces (above) look pretty straightforward, wouldn't you say? The outer studs are simply single studs. The inner studs are double studs that will hold the header between them at the top of the wall (bottom of photo). (See the header in the next photo.) Each side has a simple, short bottom plate at the bottom of the wall (top of photo). Straightforward and simple will not necessarily keep me from creating problems for myself, however. I ended up attaching the bottom plate on the right wall piece (left in photo) three times! After I first attached that bottom plate with six screws, I realized the bottom plate was upside down. (It may seem as if the top and bottom of that bottom plate would be identical, but they're not because of how I've adjusted the bottom to sit flat on the sill.) So, I removed the screws, flipped the bottom plate over, and reattached it. That's when I realized that the double stud was flipped backwards. So, I removed those four screws, flipped the double stud, and reattached it. Duh!
I added the header...
...and the first top plate.
Then I took a deep breath and started to add the top triangular part (the bane of my recent existence!).
Connecting the two top plates together straightened the upper top plate (which had had a bit of a bow in it, the cause of the problems I was having with building the top part of the wall correctly). Woo hoo! The rest of the top part went together smoothly--at least compared to the three or four other times I constructed it.
I started adding sheathing...
I didn't quite finish--I ran out of day. But it is close to done!
When I returned from Sunday-night dinner, the moon on the water was breathtaking. This is the best photo I could get...
After so much rain this past week, this day seemed blue, blue, blue. Check out this sky! (Find the plane.)
The water was very blue, too. (See it behind Bear? No, not the blue tarps; the river beyond them.)
Not to be outdone, George did a lot of hanging out in the JayBee today as well.
I listened to tenth-anniversary-of-9/11 coverage while I worked today. There were times I just stopped working and sat and cried. Even still, I managed to keep plodding along.
I decided to start by building the straight wall pieces.
These two pieces (above) look pretty straightforward, wouldn't you say? The outer studs are simply single studs. The inner studs are double studs that will hold the header between them at the top of the wall (bottom of photo). (See the header in the next photo.) Each side has a simple, short bottom plate at the bottom of the wall (top of photo). Straightforward and simple will not necessarily keep me from creating problems for myself, however. I ended up attaching the bottom plate on the right wall piece (left in photo) three times! After I first attached that bottom plate with six screws, I realized the bottom plate was upside down. (It may seem as if the top and bottom of that bottom plate would be identical, but they're not because of how I've adjusted the bottom to sit flat on the sill.) So, I removed the screws, flipped the bottom plate over, and reattached it. That's when I realized that the double stud was flipped backwards. So, I removed those four screws, flipped the double stud, and reattached it. Duh!
I added the header...
...and the first top plate.
Then I took a deep breath and started to add the top triangular part (the bane of my recent existence!).
Connecting the two top plates together straightened the upper top plate (which had had a bit of a bow in it, the cause of the problems I was having with building the top part of the wall correctly). Woo hoo! The rest of the top part went together smoothly--at least compared to the three or four other times I constructed it.
I started adding sheathing...
I didn't quite finish--I ran out of day. But it is close to done!
When I returned from Sunday-night dinner, the moon on the water was breathtaking. This is the best photo I could get...
Also see:
Categories:
cats,
duh,
framing,
kennebec river,
tiny house,
walls,
weather
Saturday, September 10, 2011
South Wall 5
The beginning of the week was all about rain--endless rain. Between Monday night and Thursday night, the rain didn't stop long enough while I was home for me to empty the JayBee of water. By Thursday night, this is what I was faced with.
After two intense hours of pouring, bailing, and mopping, I had the water out of the JayBee. I left the tarps off so everything could dry out on Friday. By this morning, things looked okay again.
I began today's construction with dismantling most of what I'd constructed of the west wall last weekend. It just wasn't right, and it wasn't close enough to right that I could live with it. Then I wasted time in indecision about how to proceed. Finally I gave up on the west wall and turned my attention to the south wall. I decided to finish sheathing the outside of the south wall. I started with the top.
Before moving down, I filled this small cavity...
with insulation, since the sheathing would make it inaccessible from the inside.
It took the rest of the day to finish, but it looks good now.
While I was working today, this butterfly stopped by.
So did Bear.
I guess I have to return to the west wall tomorrow.
Also see:
South Wall 1
South Wall 2
South Wall 3
South Wall 4
After two intense hours of pouring, bailing, and mopping, I had the water out of the JayBee. I left the tarps off so everything could dry out on Friday. By this morning, things looked okay again.
I began today's construction with dismantling most of what I'd constructed of the west wall last weekend. It just wasn't right, and it wasn't close enough to right that I could live with it. Then I wasted time in indecision about how to proceed. Finally I gave up on the west wall and turned my attention to the south wall. I decided to finish sheathing the outside of the south wall. I started with the top.
Before moving down, I filled this small cavity...
with insulation, since the sheathing would make it inaccessible from the inside.
It took the rest of the day to finish, but it looks good now.
While I was working today, this butterfly stopped by.
So did Bear.
I guess I have to return to the west wall tomorrow.
Also see:
South Wall 1
South Wall 2
South Wall 3
South Wall 4
Categories:
cats,
framing,
tiny house,
walls,
weather
Subscribe to:
Posts (Atom)