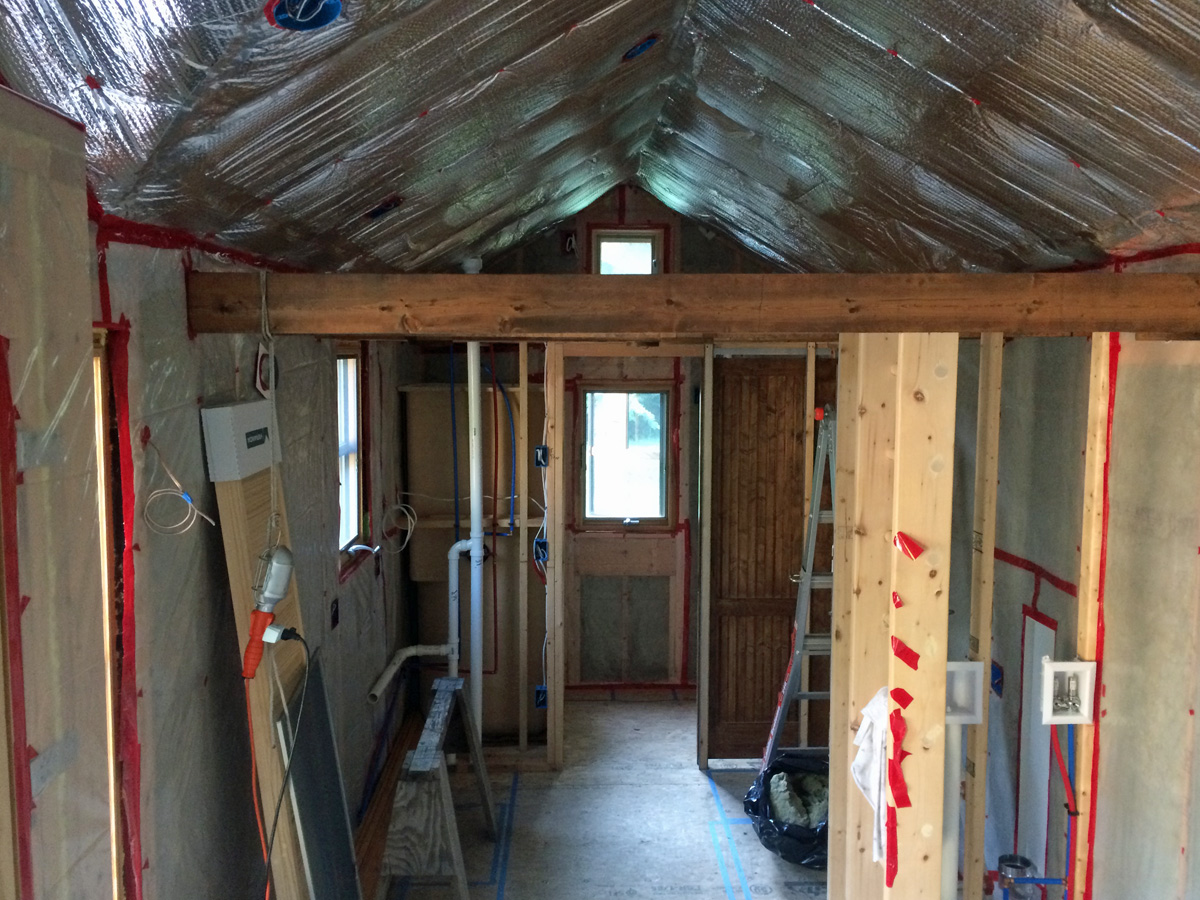
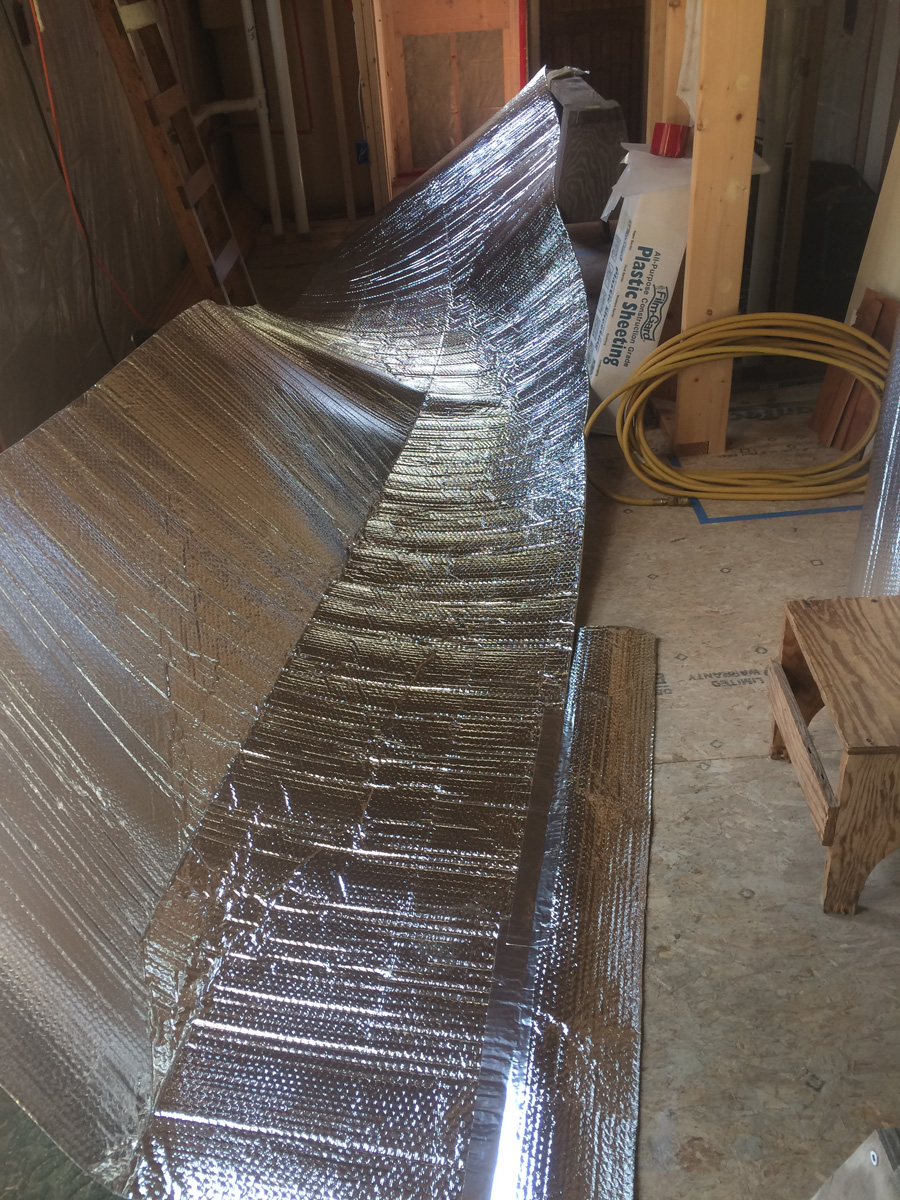
All of the vapor barrier and radiant barrier is completely done! Every joint/break/seam is taped.
I miscalculated how much radiant barrier I needed for this project--by a lot. I never even opened this last roll.
I continued to install boards in the corner of the closet...
...until I was done.
The view from the inside of the closet...
This next shot is looking straight down the outside wall of the closet. I placed a board on the outside there to show that there is a purposeful gap between the lower edge of each of those boards and the kitchen wall on the outside of the closet. The gaps should keep these boards from trapping a bunch of dirt at their bottom edges. Because...
...all of these boards are shelves for shoes!
After finishing the shoe shelves, I cleaned out the JayBee and vacuumed. From the bed alcove, looking toward the bathroom/west end...
From the bathroom looking toward the bed/east end...
The JayBee is now ready for ceiling and wall boards.
Monday, September 11, 2017
Tuesday, September 5, 2017
Miscellaneous Updates
In no particular order...
- Plumber/Thief: Some of you may remember that, a year and a half ago, a plumber took a deposit from me for rough-in plumbing work on the JayBee--and then did no work, didn't return the money, basically fell off the grid. In April 2017, I won my Small Claims case against the plumber/thief, but he did not keep up with his payments. I'm taking him back to Court next week. <sigh> It never ends. One interesting fact: I served him myself this time. Yup, it's true. After paying a Sheriff for an unsuccessful service of the plumber/thief, I served him myself. Where there's a will...
- Building Permits: My building permits expired in July and, while I hoped the Code Enforcement Officer (CEO) would take pity on me (being such a slow [but steady!] house builder) and cut me some slack; no such luck. I will have to pay again for more permits. In the meantime, Maine appears to be moving ever closer to adopting new codes for tiny houses. Since I have to get new permits, I'm concerned that what had been going smoothly with the CEO will be disrupted and a new set of rules will be applied to my build mid-project. I guess I'll just cross that bridge when I get to it. [See update posted here.]
- Bathroom Fan/Vent Fallout: Remember my long torturous day of installing the vent for the bathroom fan? The day I endlessly dropped things and spent hours combing through the thick foliage for my lost items? I ended up with some poison ivy on my hands as a result of those shenanigans. The gift that keeps on giving.
- Bear: Still no Bear. Within two weeks of Bear going missing, my neighbor's cat disappeared as well. While there may be some outside chance that Bear will return, I think it's probable that he is permanently gone. Here is a gallery of Bear.
Categories:
cats,
permits,
plumbing,
tiny house
Monday, September 4, 2017
Radiant Barrier (Almost) Done
After installing long strips of radiant barrier on the rest of the JayBee's ceiling,
I should be declaring that the entire radiant/vapor barrier is done. Unfortunately, I ran out of the tape I use to seal the joints and breaks, and the resupply I have ordered has not yet arrived. So, that means it is close to done, but not quite.
In the meantime, here is a puzzle. I have begun to install these boards in the closet wall. This is the view from the kitchen side.
This is the view from inside the closet.
Maybe you can guess what the boards are for? When I'm done installing them, I'll let you know their purpose.
I should be declaring that the entire radiant/vapor barrier is done. Unfortunately, I ran out of the tape I use to seal the joints and breaks, and the resupply I have ordered has not yet arrived. So, that means it is close to done, but not quite.
In the meantime, here is a puzzle. I have begun to install these boards in the closet wall. This is the view from the kitchen side.
This is the view from inside the closet.
Maybe you can guess what the boards are for? When I'm done installing them, I'll let you know their purpose.
Categories:
cabinets,
closets,
radiant barrier,
tiny house
Monday, August 28, 2017
More Radiant Barrier
Progress...
I have spent so much extra time on all of my non-standard architectural details--like the bumpouts and this entryway--every step of the way!
I think the inside of the JayBee is starting to look like a spaceship.
I check on George a gazillion times a day. He's mostly sleeping in one spot...
...or another.
I have spent so much extra time on all of my non-standard architectural details--like the bumpouts and this entryway--every step of the way!
I think the inside of the JayBee is starting to look like a spaceship.
I check on George a gazillion times a day. He's mostly sleeping in one spot...
...or another.
Categories:
cats,
radiant barrier,
tiny house
Friday, August 25, 2017
Vapor Barrier & Radiant Barrier
When I had made the decision to install a fan in the bathroom, I left the vapor barrier open by the awning window in the gable peak above the bathroom, thinking that the vent for the fan might go there. But no, of course not. When I opened the fan I purchased and read the installation directions, it became clear that the fan had to be vented under the eave on the north wall--a wall I had already sealed up with the vapor barrier. Of course, because that is how this project (and my life) work.
Now, though, I have finally finished installing the vapor barrier on the walls of the bathroom.
Next up: Installing the radiant barrier on the ceiling.
For those who haven't been following along for years, I am using radiant barriers on all surfaces of the JayBee. A radiant barrier adds an extra 30% to the R-value of the insulation in a surface. The radiant barrier I installed on the walls is on the exterior underneath the housewrap. Since it is perforated and not a vapor barrier, I installed plastic on the interior as the vapor barrier. The radiant barrier I used under the subfloor and that I am installing on the ceiling is a bubble-wrap type that doubles as a vapor barrier.
I started with the easy stuff--the ceiling of the bathroom bumpout...
..and the ceiling of the bed alcove bumpout.
To prepare the radiant barrier for the ceiling, I cut long strips, and added a little extra to make each piece large enough to cover half of the ceiling.
Beginning to install the radiant barrier over the bed alcove and reading-nook/guest-room loft.
Now, though, I have finally finished installing the vapor barrier on the walls of the bathroom.
Next up: Installing the radiant barrier on the ceiling.
For those who haven't been following along for years, I am using radiant barriers on all surfaces of the JayBee. A radiant barrier adds an extra 30% to the R-value of the insulation in a surface. The radiant barrier I installed on the walls is on the exterior underneath the housewrap. Since it is perforated and not a vapor barrier, I installed plastic on the interior as the vapor barrier. The radiant barrier I used under the subfloor and that I am installing on the ceiling is a bubble-wrap type that doubles as a vapor barrier.
I started with the easy stuff--the ceiling of the bathroom bumpout...
..and the ceiling of the bed alcove bumpout.
To prepare the radiant barrier for the ceiling, I cut long strips, and added a little extra to make each piece large enough to cover half of the ceiling.
Beginning to install the radiant barrier over the bed alcove and reading-nook/guest-room loft.
Preparing a strip of the radiant barrier is pretty easy. Stapling the radiant barrier to the rafters is not very hard either. Covering every staple with tape, and sealing the radiant barrier to the plastic on the walls with tape--very time consuming.
I think installing the ceiling boards over this radiant barrier is going to be challenging. I like being able to see through the plastic on the walls--to see where all the framing is. Anticipating not being able to see through the radiant barrier while installing boards on the ceiling... hmm. We'll see how it goes.
Categories:
radiant barrier,
tiny house,
vapor barrier
Thursday, August 24, 2017
Dryer Vent
All the time I spent thinking about the bathroom vent brought me to think about the dryer vent as well.
I had installed the dryer vent very early on--well before installing the shingles on the north wall of the JayBee.
I installed it low on the wall, even though the dryer will sit on top of the washer in the house, because no appliance lasts forever and a possible future washer/dryer combo unit could still use this vent without having to blow upwards to vent. With my current washer and dryer stacked, though, it will require snaking duct hose down the wall from the dryer to the vent lower down the wall.
Here is the wall with the dryer vent, all insulated and protected with the vapor barrier.
The more I thought about it, the more I thought that the dryer vent wasn't quite right. If an elbow and round duct was installed on the inside of this wall, the washer and dryer would be pushed out from the wall by more than four inches. Too much real estate inside the house wasted.
I briefly considered buying specialized duct that is flattened rather than round and takes up less room, but I was worried that it would encourage the buildup of lint. (I know I should regularly clean all lint out of the dryer vent, but I rarely actually do so.) So, I am sticking with round dryer duct.
I decided I had to build a channel inside the wall so that part of the diameter of the duct can run inside the wall.
<sigh> I opened up the finished vapor barrier...
...and pulled out the insulation--at least the insulation in front of the wires. Hmm, there certainly are a lot of wires in this wall.
All those wires take up so much room in the wall that I can't push the dryer duct as far into the wall as I was hoping to. Nevertheless, I trimmed the vent stack to be shorter, and I built this channel.
I primed the channel and covered the back side of it with plastic--so the vapor barrier will end up being uninterrupted across this wall. I installed the channel in the wall, and I installed one of the elbows in the vent.
I insulated well behind the channel and insulated the rest of the wall cavity.
Then, I restored the vapor barrier.
Without extending the duct or installing it, I propped the duct and upper elbow in the channel to get a rough idea of how this will work.
While it looks like all this work and the special channel will only save about an inch of space, once the tongue-and-groove boards are installed on the wall, it will save close to two inches. I'm pleased with the results.
I had installed the dryer vent very early on--well before installing the shingles on the north wall of the JayBee.
I installed it low on the wall, even though the dryer will sit on top of the washer in the house, because no appliance lasts forever and a possible future washer/dryer combo unit could still use this vent without having to blow upwards to vent. With my current washer and dryer stacked, though, it will require snaking duct hose down the wall from the dryer to the vent lower down the wall.
Here is the wall with the dryer vent, all insulated and protected with the vapor barrier.
The more I thought about it, the more I thought that the dryer vent wasn't quite right. If an elbow and round duct was installed on the inside of this wall, the washer and dryer would be pushed out from the wall by more than four inches. Too much real estate inside the house wasted.
I briefly considered buying specialized duct that is flattened rather than round and takes up less room, but I was worried that it would encourage the buildup of lint. (I know I should regularly clean all lint out of the dryer vent, but I rarely actually do so.) So, I am sticking with round dryer duct.
I decided I had to build a channel inside the wall so that part of the diameter of the duct can run inside the wall.
<sigh> I opened up the finished vapor barrier...
...and pulled out the insulation--at least the insulation in front of the wires. Hmm, there certainly are a lot of wires in this wall.
All those wires take up so much room in the wall that I can't push the dryer duct as far into the wall as I was hoping to. Nevertheless, I trimmed the vent stack to be shorter, and I built this channel.
I primed the channel and covered the back side of it with plastic--so the vapor barrier will end up being uninterrupted across this wall. I installed the channel in the wall, and I installed one of the elbows in the vent.
I insulated well behind the channel and insulated the rest of the wall cavity.
Then, I restored the vapor barrier.
Without extending the duct or installing it, I propped the duct and upper elbow in the channel to get a rough idea of how this will work.
While it looks like all this work and the special channel will only save about an inch of space, once the tongue-and-groove boards are installed on the wall, it will save close to two inches. I'm pleased with the results.
Categories:
appliances,
insulation,
tiny house,
vapor barrier,
ventilation
Subscribe to:
Posts (Atom)